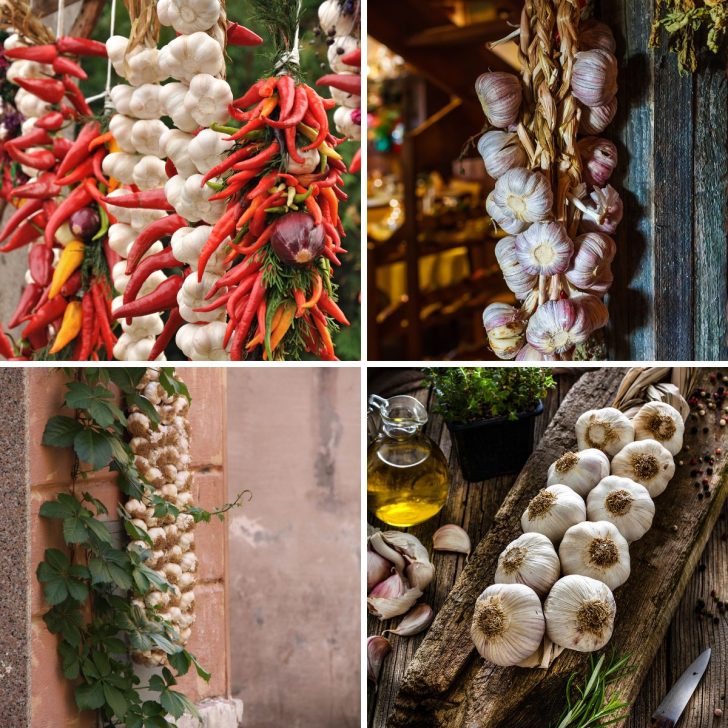
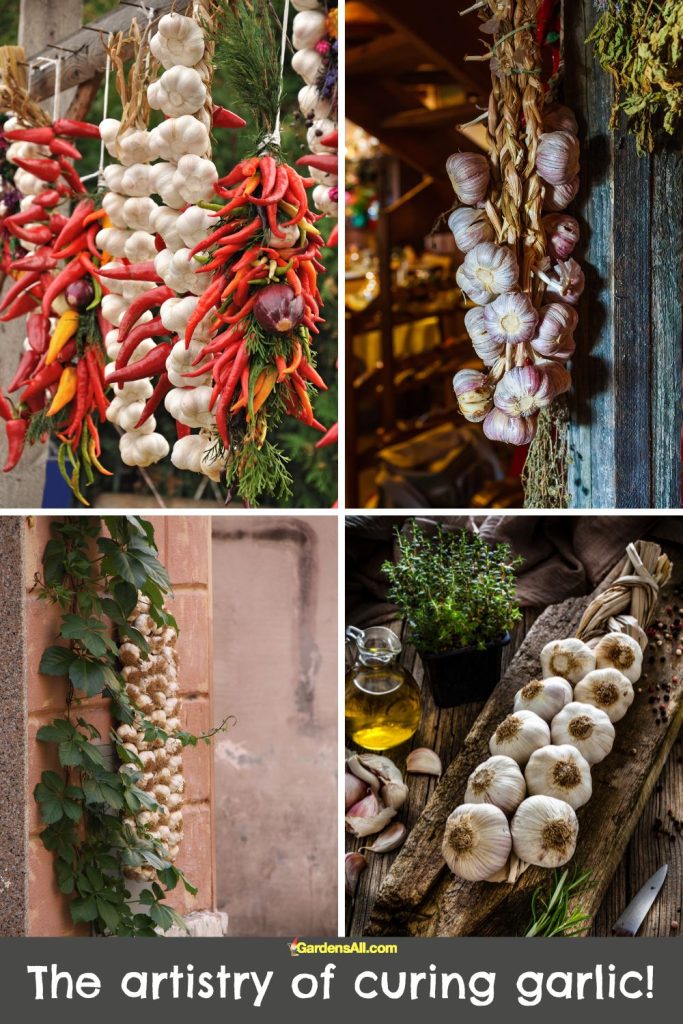
There are so very many ways for curing garlic. From artistic to folksy, from tiny harvests to market gardeners, from homesteads to farms, there’s definitely no one way to get the job
A significant part of ensuring a healthy, flavorful batch of garlic is knowing how to correctly dry and cure it post-harvest. This article explores various methods and commonly used locations for curing garlic, towards a bountiful, long-lasting supply.
A GUIDE TO CURING GARLIC
Before we get into some of the different methods and modes for curing garlic, let’s run through a few typical questions and answers around it all.
But if you only want to know how to cure garlic and not why, how long, optimal storage, etc., you can skip on down to How to Hang Garlic to Cure.
What Does Curing Mean?
Drying and curing refer to the process of preparing the garlic for long-term storage. Drying involves reducing the initial moisture content in the garlic, while curing is the gradual process where the garlic further dries under controlled conditions.
Why Does Garlic Need to Be Cured?
The process of curing garlic, hardens the outer skins which seal in the rich, pungent flavor of the cloves inside.
Properly dried and cured garlic is more resistant to molds and pests, and the flavors become more concentrated and robust, as is typically the case with dried foods. But the main reason for curing garlic is to extend the shelf life for many more months of use.
How Long Does it Take to Cure Garlic?
Curing garlic typically takes 2-3 weeks, but that also depends on the method used.
And How Long Does Cured Garlic Typically Last?
The shelf life of properly cured garlic can vary depending on the storage conditions, healthy condition of the garlic crop and the variety of the garlic. That said, properly cured and stored garlic can last from 6-12 months.
Do You Have to Cure Garlic Before Eating?
No, it’s not necessary to cure garlic before eating it. As indicated above, the main reason behind curing garlic is to extend its shelf life. Freshly harvested garlic can be used immediately and many people enjoy the unique flavor of “green” or “wet” garlic.
So if you’re just growing a little bit of garlic, for instance, and you’re likely to use it up within a couple weeks, then curing isn’t necessary. In that case you can store it in a jar of other sealed container for up to a couple weeks or so.
Then plant more the next season! After enjoying your own fresh homegrown garlic, chances are that you’ll definitely want to grow more garlic.👩🏻🌾🧄👨🏻🌾
See also, our article on Types of Garlic to Grow.

How to Hang Garlic to Cure
We’ll cover garlic curing methods and locations next, but first, some information on ways to tie garlic for hanging to cure.
Hanging garlic to cure is a popular method due to its simplicity and effectiveness. Here are some strategies to ensure the process goes smoothly:
1. Braided Garlic – the Most Popular Way to Hang Garlic (for Softneck Varieties)
For softneck garlic varieties, braiding is not only an effective method for hanging and curing but also a beautiful way to store your harvest. To braid garlic, start by selecting three robust stems and begin braiding them together, adding in new stems as you go. Once you’ve included all your garlic, secure the braid with twine or a rubber band.

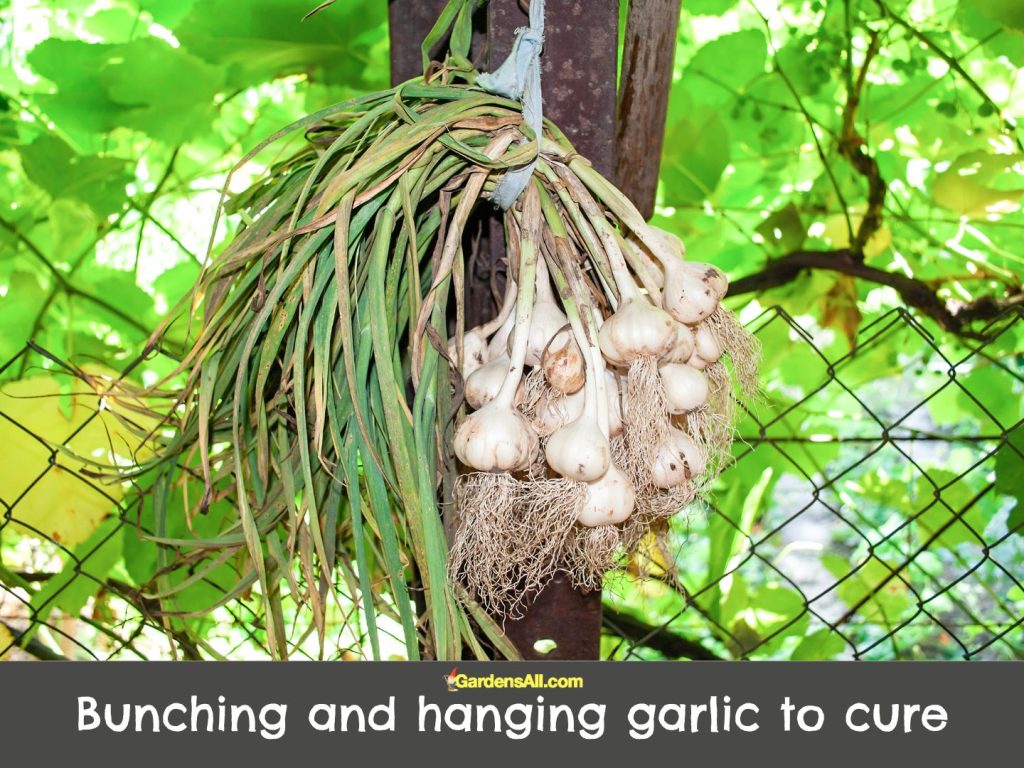
2. Bunch and Tie
The most common method is to tie the garlic stalks together. After harvesting, gently brush the dirt off the bulbs and set them aside for a few hours to allow moisture to evaporate. A soft vegetable brush works well for that.
Then, bunch together 6-10 garlic plants by their stalks and tie them securely using twine or a rubber band. Be sure not to tie too tightly as to damage the stalks or bulbs.
NOTE: Some people bunch together many more, even dozens. That can work if you’re in a dry climate or have a climate controlled room. In our humid state of North Carolina, it’s best to bunch together fewer quantities at a time.

3. Tying Garlic to Drying Rack, Line or Post, etc.
If the garlic stalks are too short or fragile to tie, a drying rack can be a useful tool. This is a little different from bunching and tying. Rather than bunching a cluster and tying it with string, you’re attaching the string or twine to the drying rack, then tying the garlic bulbs (often one at a time). This method ensures good airflow around each bulb and allows you to easily inspect and rotate your garlic.
4. Weaving Garlic Stalks on a Mesh Grid (for Softneck & Hardneck Garlic)
We had some extra plastic mesh fencing on hand (pictured below) that we used for keeping the dogs away from garden beds, so this is one of the methods we use.
Weaving garlic onto a grid, using materials such as plastic mesh fencing or barrier netting, offers a space-efficient solution for curing. Simply secure the mesh horizontally between two supports, then weave the cleaned garlic stalks through the grid, allowing the bulbs to hang freely below.
This setup should be placed in a well-ventilated, dry location out of direct sunlight. It’s best to space the garlic bulbs evenly for proper airflow, regularly check for spoilage, and adjust if needed.
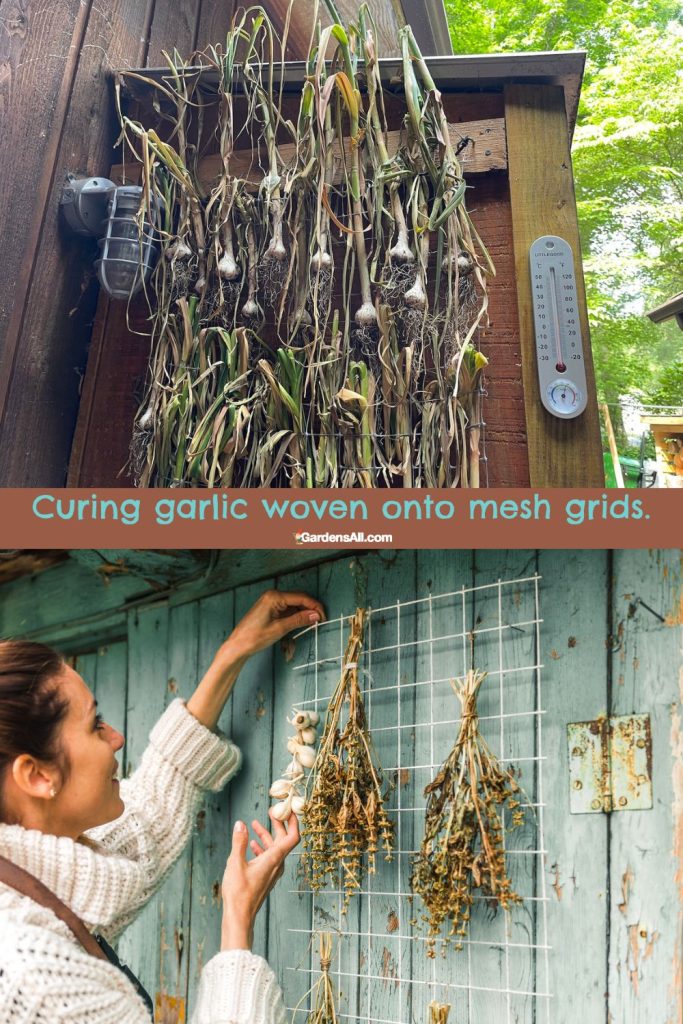
Here’s Coleman sharing his weaving method of hanging garlic to cure.
Methods of Drying and Curing Garlic
The duration of the curing process can vary depending on the method used, as well as other variables such as the size of the garlic bulbs, humidity levels, and ambient temperature.
The garlic stems may be cut before or after curing, but it’s best to leave them on for all hanging methods.
Below are some general guidelines for curing garlic after harvesting:
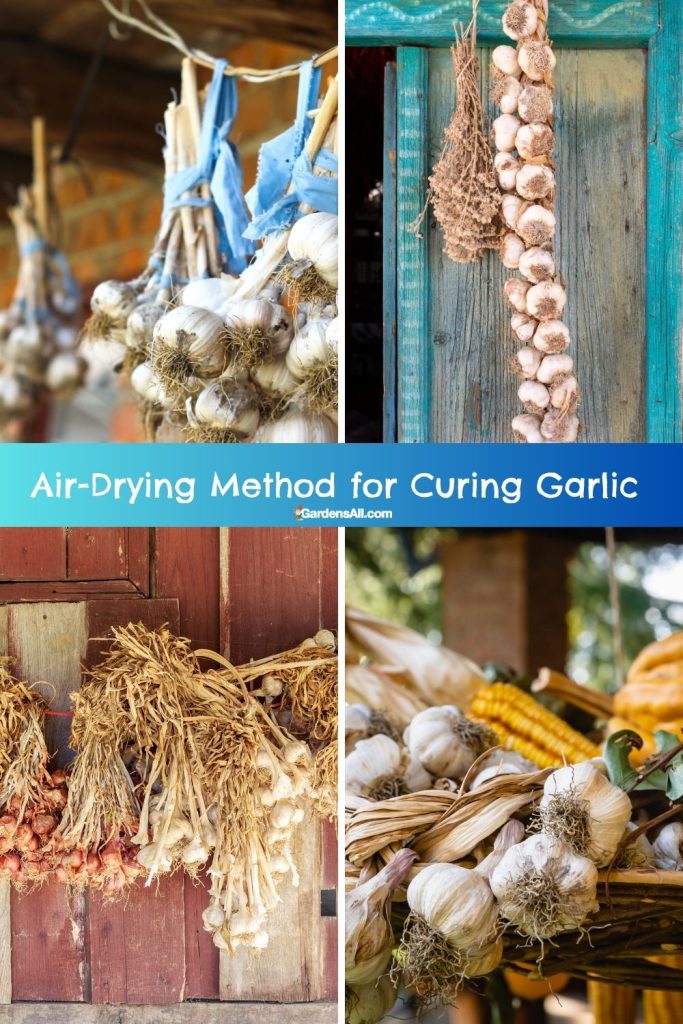
1. Air-Drying Method for Curing Garlic
The most common method for drying garlic is simple air drying or curing.
- Remove any dirt from the garlic by gently rubbing the bulbs.
- Do NOT wash them, as this can introduce unwanted moisture.
- Bundle several garlic stalks in bunches by tying or braiding them together by the stalks*
- Hang garlic bundles in a well-ventilated, warm, and dry place out of direct sunlight.
NOTE: Many people bundle as many as 6-10 plants together, and some cluster dozens together in big bunches. That works fine in dry environments, but since we live in a humid area we don’t typically bind more than 3-6 cloves together. This gives each clove more space for airflow so as to cure the garlic without getting moldy, which can happen if they’re too clustered in high humidity.
Air dried garlic is cured in approximately 3-4 weeks, depending on the climate conditions and size of the garlic.
2. Rack Drying Garlic
If space is limited, rack drying is another excellent option. There are a variety of options, from floor racks to hanging, and in wire, wooden or fabric/mesh drying racks. These latter can also be used for drying herbs, and which can be hung inside or outside, so long as protection from rain is provided.
- Lay the harvested garlic on a drying rack.
- Arrange for optimal circulation and avoid overlap the cloves.
- Turn the bulbs occasionally for even drying.

Quick Curing Garlic
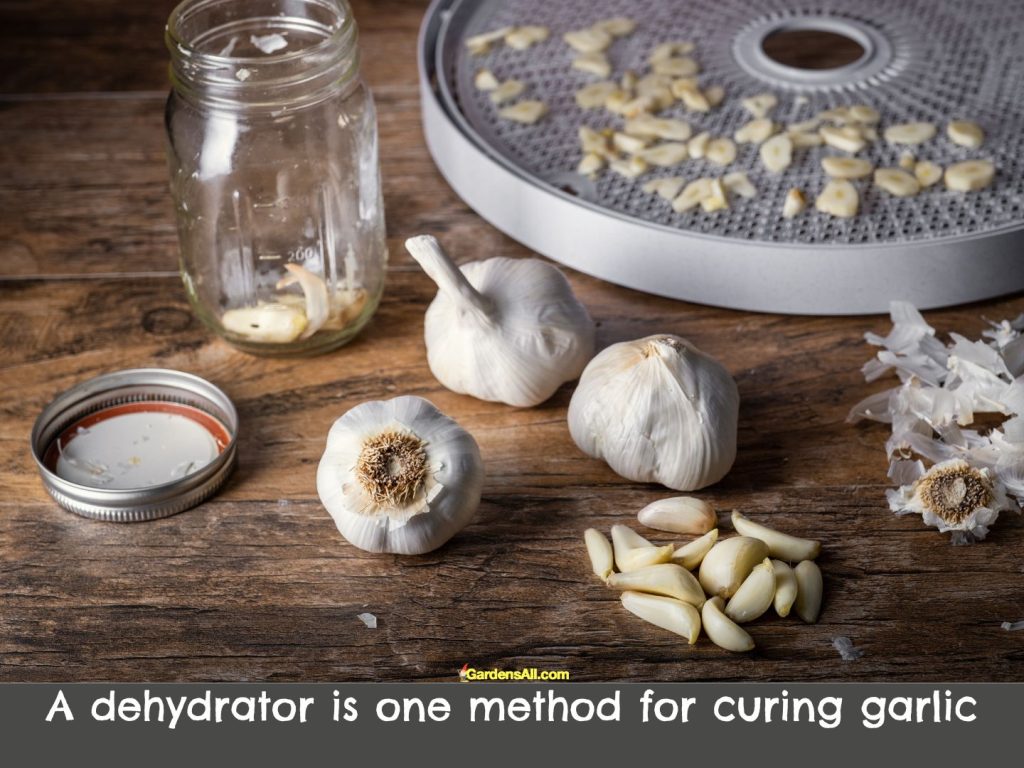
- Dehydrator
- Oven drying
- Sun drying
CAUTION IN FAST DRYING GARLIC: These three methods can cure garlic much faster, however, they can also dehydrate it rather than cure it. Dehydrated garlic can still be used to make garlic powder, but isn’t as good for using as fresh garlic. So take care, use the lowest possible temperature and check it every 6-12 hours.
3. Dehydrator or Oven Drying Garlic
For those in humid climates or who want to expedite the process, a food dehydrator or an oven can be used. The goal is to use the lowest possible heat in either option and check it often. You want to cure the garlic, not cook it or dry it out completely.
- DEHYDRATOR: Set temperature at the lowest setting, which is generally around 95°F (35°C).
- OVEN: Use the warming setting if your oven has one. The goal is the lowest possible temperature, so around 140°F (60°C). Leave the door slightly ajar for air circulation.
To cure garlic in a dehydrator can take approximately 48 hours, depending on the appliance and size of the garlic. Check it at 12 hour intervals.
4. Sun Drying Garlic
Sun drying is a traditional method of drying garlic and other crops, predominantly used in regions with strong sunlight and low humidity. However, caution should be exercised while sun drying garlic in order to avoid damage caused by excessive exposure to sunlight.
- Spread garlic in a single layer on a clean surface, such as a drying rack or screen. (Preferably not a solid surface.
- Arrange to ensure good airflow above and below to help prevent mold, while ensuring more even drying. If you end up using a solid surface, then be sure to turn your bulbs to rotate them for even exposure to sun and air.
You may wish to protect the garlic from direct sunlight by covering the bulbs with a breathable fabric like a white plant cover. (Don’t use the black shade cloth unless it’s arranged to hover over the curing garlic like a tarp, rather than like a blanket.
Keep in mind that sun drying is not recommended if other options are available. But if you do it, just be sure to closely monitor to prevent over-drying or potential damage. Too much sunlight can cause the garlic to become brittle or lose its potent flavor.
This method is also weather-dependent, so be prepared to move the garlic indoors in case of rain or high humidity. The length of drying time varies, but most garlic will dry within 4-6 days in optimal conditions, but check your garlic cloves daily.
Common and Locations and Ways for Curing Garlic
Garlic is traditionally cured outdoors under cover from sun and rain, such as in barns, sheds and porches. We started out curing garlic inside our pantry one year but discovered that was a big mistake, as it stunk up the whole house. And raw garlic permeating every atom of the home isn’t the same as the tantalizing fragrance of garlic cooking!
Where to Cure Garlic?
1. Sheds or Barns
Sheds and barns are traditional locations for curing garlic, offering plenty of space and typically good ventilation. Ours is a water stove and storage building and with only one window. Since it doesn’t have enough airflow, we hung our garlic under the eaves of the exterior of our building.
Under eaves can protect from sun, so long the garlic is hung on the north or northeastern side. And the rain doesn’t usually get to it either unless its a storm with strong wind, in which case you could relocate it temporarily.
Coleman made a simple frame around plastic mesh fencing for weaving in the garlic.
2. Garages
For home gardeners, garages often serve as convenient and effective curing locations. Ensure the area is well-ventilated and doesn’t experience extreme temperature shifts.
3. Porches
Covered porches can also serve as good locations for curing garlic, provided they’re protected from rain and direct sunlight. The open-air environment promotes good airflow.
4. Indoors
In cases where outdoor space is limited, curing can take place indoors. Spare rooms, attics, or basements with proper ventilation can serve as excellent curing locations.
However, a word of warning: if you cure garlic inside your home, be prepared for the raw garlic odor to permeate every molecule of air in your home! That’s something even garlic lovers might not choose to live with for two weeks!
How to Tell When Garlic is Cured?
So how can you tell when garlic is cured and ready to be moved from the airy curing space to your kitchen or pantry? Here are some guidelines:
- Stalks and Roots: The stalks (for hardneck varieties) and roots should be completely dry and brittle. The roots, in particular, should feel like stiff brush bristles.
- Outer Wrappers: The outer skins or wrappers on the garlic bulbs should feel papery and dry. They will often take on a straw or tan color, although this can vary based on the garlic variety.
- Overall Weight: The bulbs will feel lighter as the moisture content has reduced. However, the cloves inside should still feel dense and firm.
- Clove Quality: When you cut into a bulb, the cloves should be plump and fill their skins. They should not be shriveled or excessively dry.
Remember, curing times can vary depending on the method used and specific environmental conditions. Therefore, it’s important to regularly check on your garlic throughout the curing process to ensure optimal results, and in case you need to turn or thin the clusters should you see signs of mold.
Once fully cured, garlic can be stored for many months, offering a flavorful addition to your meals all year round.
Okay, that’s a wrap, friends! We’d love to hear your favorite method and tips.
Wishing you a healthy harvest and successful garlic curing experience❣️🙏🏼🧄
I’m LeAura Alderson, a garden, herb and plant enthusiast with a passion for discovering the many edible and medicinal benefits of the plants all around us, including the weeds, while transforming the land through regenerative permaculture practice. I am also a writer, editor and media publisher (now mostly retired due to replacement by AI), but which now allows more time to build our regenerative permaculture homestead farm.