
We’re growing calendula every spring and enjoy the cheerful presence all summer and into fall. We also harvest the flowers periodically for some of the many wonderful benefits of calendula for which this beautiful flower is famous.
Calendula, often referred to as pot marigold, is a cheerful, easy-to-grow plant that features vibrant, yellow to orange blooms. Native to Mediterranean regions, it is cherished for both its ornamental and medicinal properties. This guide will cover everything you need to know on growing calendula in different USDA hardiness zones.
Calendula is a cool-season, self-seeding annual plant that can adapt to a wide range of conditions. It thrives in USDA hardiness zones 2 through 11, and can be planted in early spring or late fall, depending on the climate of your specific zone.
Hopefully this guide on how to grow calendula, will answer all your questions, but it not, feel free to write to us with any questions or gaps noted.
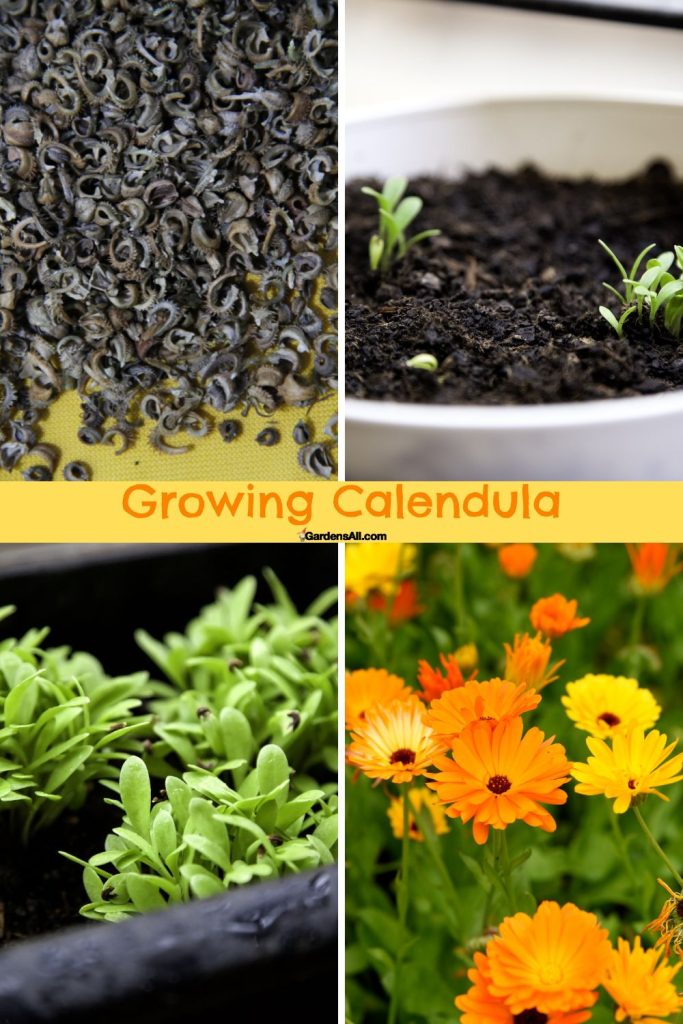
GROWING CALENDULA
Calendula Planting Instructions by USDA Hardiness Zone
- Zones 2-4: In colder zones like 2-4, start your calendula seeds indoors approximately 6-8 weeks before the last expected frost date. After danger of frost has passed, seedlings can be transplanted outdoors to a sunny (or partly sunny) location.
- Zones 5-6: In zones 5-6, you can direct-sow calendula seeds in your garden 1-2 weeks before the last spring frost date, or start them indoors 6-8 weeks before the last frost date for an earlier start.
- Zones 7-10: For zones 7-10, calendula seeds can be sown directly in the garden in early spring or in the fall. Fall planting allows the plants to establish themselves and bloom early the following spring.
- Zone 11: In the warmest zone, zone 11, calendula is best sown in the fall or winter as the cooler temperatures of these seasons provide the optimal growing conditions.
Or here’s a handy chart:
| USDA Zone | Planting Time | Care Instructions |
|---|---|---|
| 2-4 | Start indoors 6-8 weeks before last frost. Transplant outdoors after danger of frost. | Water 1-2 times per week. Fertilize once a month. |
| 5-6 | Direct-sow 1-2 weeks before last frost or start indoors 6-8 weeks before last frost. | Water 1-2 times per week. Fertilize once a month. |
| 7-10 | Direct-sow in early spring or in the fall. | Water 1-2 times per week. Fertilize once a month. |
| 11 | Sow in the fall or winter. | Water 1-2 times per week. Fertilize once a month. |
Regardless of your hardiness zone, make sure to choose a planting site that gets full sun to partial shade. Calendula is a relatively easy plant to care for and the soil doesn’t need to be particularly rich, just well-draining.
How to Grow Calendula
Calendula seeds have a high germination rate and usually sprout within 5 to 15 days, and they do not require any special preparation before planting.
So calendula seeds do NOT need to be soaked, cold stratified, or scarified before planting. They can be placed directly into soil at the right temps.
Germinating Calendula
Here are some tips to ensure successful germination:
- When to Plant Calendula: They can be direct sown outdoors in spring or fall (depending on your hardiness zone) or started indoors. If starting indoors, it’s generally recommended to start the seeds about 6-8 weeks before the last frost date. (You can calculate frost dates by zip code).
- Soil Preparation: Prepare the soil by removing any debris and breaking up any large clods. The soil should be fine and crumbly for the best germination conditions.
- Sowing Seeds: Sow the seeds approximately 1/4 to 1/2 inch deep in the soil. The seeds do not need to be spaced perfectly as calendula plants are quite forgiving and can be thinned out after sprouting. (See how to thin out calendula sprouts).
- Watering: After sowing, water the soil gently but thoroughly. The soil should remain evenly moist, but not waterlogged, until germination occurs. Overwatering can cause the seeds to rot, so moderation is key.
- Light Requirement: Calendula seeds need some light to germinate, so do not bury them too deeply in the soil.
- Temperature: Calendula seeds germinate best at temperatures between 55-70 degrees Fahrenheit (13-21 degrees Celsius).
- Thinning: Once the seedlings have sprouted and grown their first set of true leaves (the leaves that appear after the initial pair of seed leaves), thin them to approximately 8 to 18 inches apart.
Calendula Germination Chart
| Germination Stage | Time | Instructions |
|---|---|---|
| Sowing | Day 0 | Sow seeds 1/4 to 1/2 inch deep. |
| Sprouting | Day 5-15 | Keep soil evenly moist. Provide light. |
| True leaves appear | Week 2-3 | Thin seedlings to 8-18 inches apart. |
| Transplanting | After last frost (for zones 2-6) | Harden off seedlings, then transplant outdoors. |
These charts provide a handy reference to help gardeners know what they should be doing and when for their calendula plants.
How to Thin Out Calendula Sprouts
Thinning out your calendula seedlings ensures that the remaining plants will have the necessary space to grow and flourish. Here’s how to do it:
- Wait for the Right Time: Wait until your calendula seedlings have at least two sets of true leaves. True leaves are the ones that appear after the initial seed leaves (cotyledons). This usually happens a few weeks after germination.
- Choose the Strongest Seedlings: You’ll want to leave the most vigorous, healthiest-looking seedlings. These will be the plants that have the best chance of thriving.
- Plan the Spacing: Calendula plants should be spaced about 8 to 18 inches apart. This gives each plant room to grow and ensures good air circulation, which can help prevent disease.
- Remove Extra Seedlings: To thin out the seedlings, gently pull out the excess plants at soil level. Be careful not to disturb the roots of the remaining seedlings. If the soil is moist, they should come out easily. If pulling seems to disturb the neighboring seedlings, you can also use a pair of small scissors to cut the unwanted seedlings at soil level.
- Water After Thinning: Water your seedlings lightly after thinning to help the remaining plants recover from any root disturbance.
Remember, the goal of thinning is to give your calendula plants the best chance of growing strong and healthy, and producing plenty of beautiful blooms. It might seem harsh to pull out perfectly good seedlings, but your garden will benefit from it in the long run.
Can You Replant Thinned Seedlings?
However, if, like us, you really don’t like to waste anything, you may be wondering if you can you replant the thinned seedlings. Or perhaps those would be good candidates for planting in pots or or even tossing into your compost pile to see what happens…?
So yes! You can certainly try to transplant the thinned calendula seedlings. While it’s not always successful due to the stress it puts on the young plant, plus remember, these were the weaker ones of those that remained. However, it’s absolutely worth a try if you hate the idea of discarding the extra seedlings, and you have the time and space to plant them elsewhere.
How to transplant thinned seedlings:
- Moisten the Soil: Ensure the soil is moist before you start the thinning process. This will help the seedlings come out with their root systems intact.
- Gently Remove Seedlings: Carefully pull out the seedlings you want to transplant, trying to keep as much of the root system intact as possible.
- Prepare the New Location: If you’re planting calendula in pots, prepare pots with a good quality potting mix. Make a small hole in the center of the pot large enough to accommodate the seedling’s roots. Alternately, if planting multiple seedlings into a larger pot, we like to make a hole in the center, then around 4-8 holes (depending on the pot size) evenly spaced around the perimeter of the pot. This should give them ample room to grow for a while and if they all thrive, you can always repotted into larger or individual pots later.
- Transplant Quickly: Transplant the seedling as quickly as possible to its new location to minimize the shock. Try to plant it at the same depth it was growing at before.
- Water Thoroughly: After transplanting, water the seedling well, but without drowning. This will help the soil settle around the roots and also provide much-needed hydration for the plant. Mist or water lightly daily (in absence of rain, or if growing under cover), as the top of the soil will dry out quickly.
- Keep Protected: It might be beneficial to keep the transplanted seedlings in a somewhat protected environment for a few days, like a shaded spot, before moving them to their final location. This will help protect them as they recover from transplant shock.
Transplants
Remember, not all transplants will be successful. But with gentle handling and prompt relocation to a welcoming environment, you can give your calendula seedlings a good chance at a second life in a new location.
So it’s worth a try if you’re so inclined and have the space and time to. It may be that in a less dense planting, the weaker ones will have a better chance to thrive.
We’ve had all kinds of volunteer plants grow up in our compost pile over the years, including an entire papaya tree that grew up to about 8 feet tall! But sadly, come winter, it didn’t thrive inside.
We knew it likely wouldn’t have the right conditions to bear fruit, but many tropicals that won’t bear fruit in colder zones can be grown for their leaves. That’s what we’re doing with avocado leaves and mango leaves.
But if not, don’t worry about tossing the thinned plants into the compost. We get it. In early spring we’re eagerly identifying all the signs of green in the edible weeds around us, and nibbling on wild wood sorrel and thinned plants as microgreens. Then by summer, we’re tossing all kind of things into the compost! When everything’s growing like crazy, we can’t nurture everything!

Growing Calendula in Clay Soil
Our friend, Shannon, is challenged with growing in clay soil, so we’ve included this information to help her and others who may struggle with this.
Shannon is a beekeeper and has written about pollinator flowers for bees here.
Growing calendula in clay soil can be a bit challenging since clay soils have a tendency to drain poorly and can become compacted, which isn’t ideal for most plants. However, there are steps you can take to improve these conditions for calendula:
- Amend the Soil: Add organic matter to your clay soil to improve its structure and drainage. Compost, well-rotted manure, or leaf mold can be mixed into the top layer of the soil. This will increase its nutrient content and help it drain more effectively.
- Plant in Raised Beds: If you have particularly heavy clay soil, consider planting your calendula in raised beds filled with a mix of topsoil, compost, and sharp (gritty) sand. This will provide the calendula with a well-draining growing medium and will also raise the plants out of the dense, compacted clay.
- Avoid Overwatering: Clay soil retains water well, so be careful not to overwater your calendula plants. Allow the soil to dry out between waterings.
- Mulch: A layer of organic mulch can help to prevent the clay soil from forming a crust and cracking when it dries out. Mulch also adds organic matter to the soil as it breaks down over time.
- Proper Spacing: Make sure to space your calendula plants appropriately (about 8 to 18 inches apart) to allow for air circulation and prevent fungal diseases, which can be more prevalent in clay soil conditions.
Remember, amending clay soil is a process and it may take a few seasons of adding organic matter before you see a significant improvement in soil structure. Be patient and persistent in your efforts.
Have Fun Growing Calendula!
In conclusion, calendula is a versatile and beautiful plant that adds a vibrant splashes of sunshine color to any garden. Its wide adaptability to different hardiness zones makes it a favorite amongst gardeners everywhere. Whether you live in the chilly zones of the north or the warm, sunny south, with the right care and attention, you can enjoy the vibrant blooms of calendula in your own garden.
Beyond beauty, this pot marigold attracts and pollinators while deterring some pests. There are many healthy benefits of calendula as well. Towards that, you may enjoy learning about the best medicinal calendula plants to grow.

Happy gardening❣️🌼🌹
I’m LeAura Alderson, a garden, herb and plant enthusiast with a passion for discovering the many edible and medicinal benefits of the plants all around us, including the weeds, while transforming the land through regenerative permaculture practice. I am also a writer, editor and media publisher (now mostly retired due to replacement by AI), but which now allows more time to build our regenerative permaculture homestead farm.