DIY Worm Farm Compost Bins
Shannon Black has it going on! She makes her own vermiculture worm bins and shows us how to make a worm farm for under $20.
When we shared an article on the Gardens All Facebook Page, Shannon Black posted some great comments. That sparked a lengthy conversation and her posting pictures of her homemade worm bins.
We love sharing the knowledge and experience from members of the Gardens All community! If you have gardening experience you’d like to share, send us a note.
Some of you have been doing all this longer than we have, bigger than we have and more than we have. So when we can share experience and expertise from amongst you, all the better!
That’s certainly the case with Shannon Black. Shannon loves worms and she’s created her own worm “farm” that’s serving her garden.
Rich Organic Compost Bin Worm Farm
Our outdoor, 3-bin organic compost system is our “worm farm”. Living in the woods with lots of humus fertile soil, it stays loaded with earthworms and red wigglers. But if you need to supplement yours, Shannon’s step-by-step photos and tips should get you going in no time!
Few things are beneficial to good soil and compost than a healthy population of wiggler worms.

How to Make a Worm Farm
Contributed by Shannon Black
Here are excerpts from our Facebook conversation with Shannon Black:
Shannon: Love my worms… and have tons. I harvest them and made a ten gallon stacking compost bin system. I feed them kitchen scraps and then make my own homemade compost & worm castings tea for the garden.
Gardens All Excellent. Did you start by buying a box of worms? It’s pretty cool that you can actually buy worms on Amazon! Seems like that’s the best way to get a jumpstart on the worm population.
Shannon: First batch a couple years ago, I harvested from my compost pile. I supplement on occasion with a box from the nursery or cup from the bait shop. Just be sure to get “red wigglers” not regular earthworms. (Mostly just to vary the genetic lines a bit.)
“Worm castings are an effective way to repel whiteflies, aphids and spider mites and any pest that feeds on plant juices.”
~SOURCE: Vermisterra.com
Shannon’s Stacking Composting Worm Bins with Compost Tea Tray
Shannon bought two 10 gallon bins and made her “worm farm” for less than $10. She got her tubs from Walmart: Sterilite 10 Gallon Tote for just $3.97 each at the time.*
*NOTE: Prices will have changed by now.
Where to Buy 10 Gallon Tubs or Bins for a DIY Worm Farm
Buy Local. Our first go-to is our local Ace Hardware because we like to support local businesses. Our next stop is Costco for they typically have the best prices even over Amazon.
Watch for store sales. You can also scan the sales pages, especially in times of year when large storage containers are more in demand, such as holidays (for storing holiday decorations), or season changes (for storing clothing).
Pricecheck online first to price check between your local home stores, Walmart, Sam’s or Costco, and Amazon, [affiliate link to 10 gallon bins]. Prices can vary considerably, but often it’s dependent on the grade of plastic used. Since it’s harder to determine quality when ordering online, be sure to check reviews.
Check out this article for another great compost tea fertilizer.
NOTE: Prices have gone up since Shannon bought her tubs a few years ago, so check around for the best prices available, in your area. Dollar stores can also be good sources for these.
DIY Worm Farming
Lower Bin – for the compost tea tray
- Place two bricks on the inside towards each end
- position diagonally opposite each other to keep the 2nd bin from nesting completely.
Top Bin – home for layered worm farm
- Drill air holes
- tiny holes in the bottom of top bin
- larger zigzag holes about 2-3 inches under the top edge of top bin
- similar larger vent holes in the lid of top bin
Layers in Top Bin
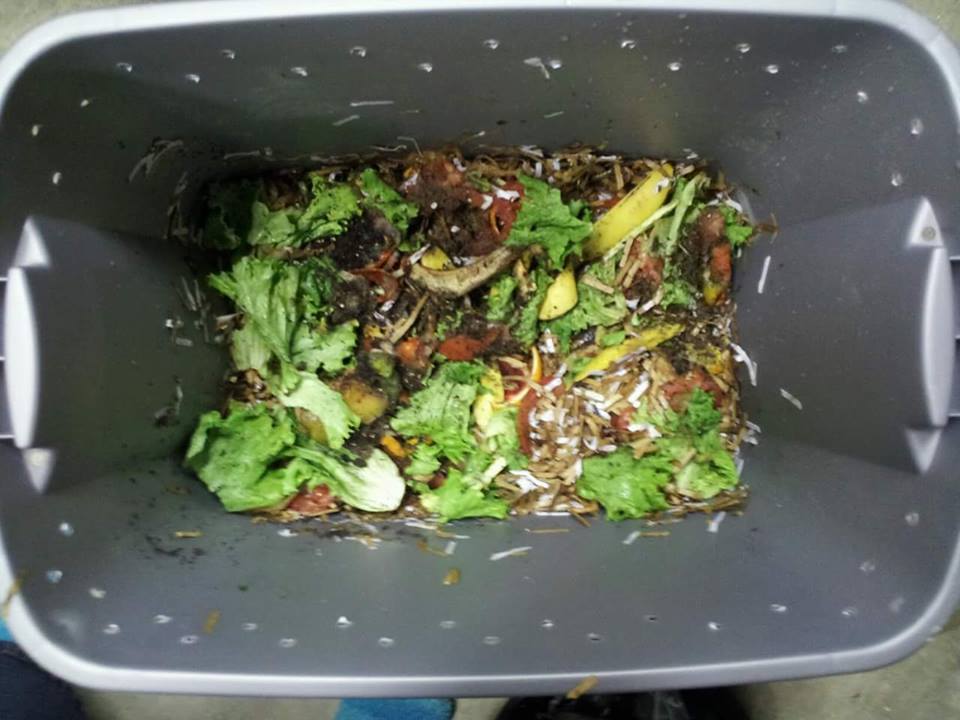
- Shredded paper products like grocery bags and office paper works, but not shredded newspaper, due to the ink and glue portions
- Worm “salad” (kitchen scraps)
- Worms
- Soil – 1-2″ loose layer to keep the fruit flies from honing in on exposed scraps
How to Feed Your Worms Food Scraps
- Use a small rake trowel to dig up one side of the worm bin layers,
- add organic material like food scraps
- push existing paper, soil and castings back over the worm bedding
- Alternate each side each week since most compost worms concentrate on the prior week’s side
- The lower bin catches the worm castings and “worm tea” that can be taken out to the garden for plants
- Use the extra lower bin lid to catch drips when you remove the “worm juice”, or castings tea catcher to deliver it to the garden.
DIY Worm Factory for Under $20!
NOTE: Supplies may cost more now.
Side View of Completed DIY Worm Bin
Here we have the breakdown of Shannon’s instructions along with the photos.
LOWER BIN –
- No holes
- Place 2-4 bricks or empty plant pots in corners of the bottom bin to prop up second bin
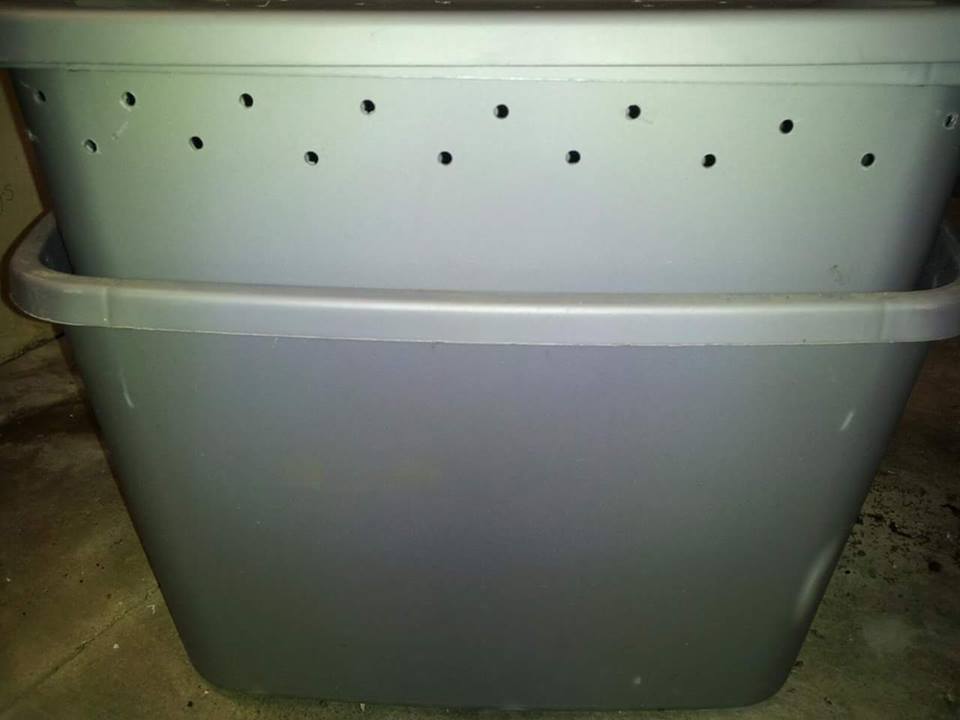
UPPER BIN – Vent Holes
Drill holes in
- upper side
- lid of upper bin


Worm composters are a great place to use shredded paper and food scraps!