
Have you been wondering how to make homemade apple cider vinegar, (a.k.a. ACV)? It’s a surprisingly quick and simple process that uses a few common ingredients that you’re likely to already have on hand.
Apple cider vinegar uses and benefits are many. ACV is exceptionally versatile and can be used in recipes, for cooking, cleaning, food preservation, beauty treatments, and for health benefits.
Three Types of Apple Cider Vinegar
There are three kinds of ACV:
- Infused apple cider vinegar
- Scrap apple cider vinegar
- True apple cider vinegar
The true ACV takes about the same amount of time to ferment as homemade apple cider vinegar. However, it’s considered a longer process when using homemade apple cider because of the time it takes to make the cider first and then the vinegar. Otherwise, scrap ACV and true ACV take about the same length of time to ferment.
Fruit and/or herb infused apple cider vinegar takes twice as long to be ready. Infused vinegar adds flavor to existing vinegar, so you’re first making and fermenting the apple cider to make vinegar, and then fermenting for another 2-4 weeks after adding the fruit or herbs.

How to Make True Apple Cider Vinegar Recipe
“True” ACV is first started by making apple cider from apples. This process involves pressing apples OR simmering sliced apples on the stove and then mashing them.
Traditional apple cider vinegar only uses pressed raw apple cider, with no add-ins. Other recipes may include orange juice, vanilla, cinnamon, allspice, or other ingredients for added depth.
You can get our complete homemade apple cider recipe here. Once the cider is made and the solid pieces strained out, it is stored away for a few weeks to ferment.
How to Ferment Apple Cider for Vinegar
After a few weeks (usually two to three weeks), it becomes a hard cider that is alcoholic but not yet vinegar.
If you give the cider the time and oxygen it needs by exposing the cider surface to air, it will automatically begin to ferment into apple cider vinegar. It’s so natural for apple cider to become vinegar that most cider producers have to immediately pasteurize and/or seal up the cider so that it won’t start the acetic acid fermentation stage.
The best way to allow for this acetic acid fermentation to start is to open the jar and lay a breathable rag or cloth over the opening. You can wrap a rubber band around the mouth of the container or use a jar ring to twist it on securely. The purpose of the cloth is to prevent dust and small pests like flies or bees from coming in contact with the ACV.
Apple cider vinegar is finished when it smells and tastes like vinegar, not alcohol.
We haven’t made hard cider yet, but we’ve included a video at the end of this article for how to make apple cider alcoholic.
How to Make Apple Cider Vinegar Without Sugar
Sugar in apple cider vinegar serves the purpose of feeding the yeast. Feeding the yeast is what kickstarts and aids the fermentation process so that apple cider vinegar is created. Most, or all, of the sugar will be consumed by the yeast and fermented out. The sugar should not spike blood sugar levels or cause any harm to the consumer. Still, if you are opposed to using sugar, you can use honey as an alternative.
How to Make Apple Cider Vinegar With Honey
Simply swap out the sugar for honey in a one-to-one ratio, and then double or triple your fermentation time as honey is slower to ferment.
If you have access to an apple cider vinegar “mother,” this is the best place to use it. The mother naturally speeds up the process, which can be largely beneficial if you choose to replace sugar with honey.
If you don’t have an ACV mother, you can add a little bit of unpasteurized apple cider vinegar to the batch to aid the fermentation process. It is not necessary to add ACV or the mother, but it is helpful if you have access to one or both of these ingredients.
How to Preserve Homemade Apple Cider Vinegar
Apple cider vinegar is highly acidic and will keep well quite easily. All you need to do to preserve apple cider vinegar is keep it in a dark area where it won’t be exposed to high heat or direct sunlight.
An airtight container is best but not a necessity.
Always keep apple cider vinegar in a glass or ceramic container so that it does not react with the container. Glass and ceramic will also preserve the taste and prevent harmful chemicals or unwanted flavors from seeping into the apple cider vinegar.
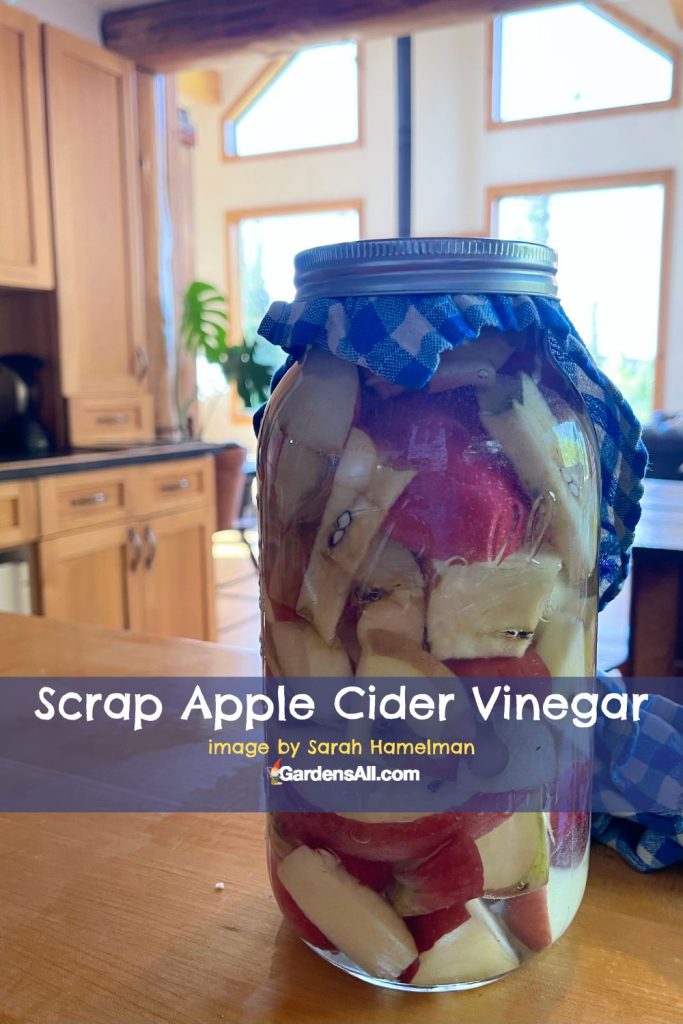
Making Homemade Apple Cider Vinegar With Apple Scraps
Scrap apple cider vinegar is a bit less acidic, so it should not be used for canning, but it tastes much better for recipes (and other uses). It’s also ridiculously quick and easy to make, which I think should count for something.
Scrap ACV is created by tossing scrap apples into a jar of light sugar water and allowing them to ferment. This will create apple cider vinegar, but the flavor will likely err more on the side of plain white vinegar rather than a strong and classic apple cider vinegar taste.
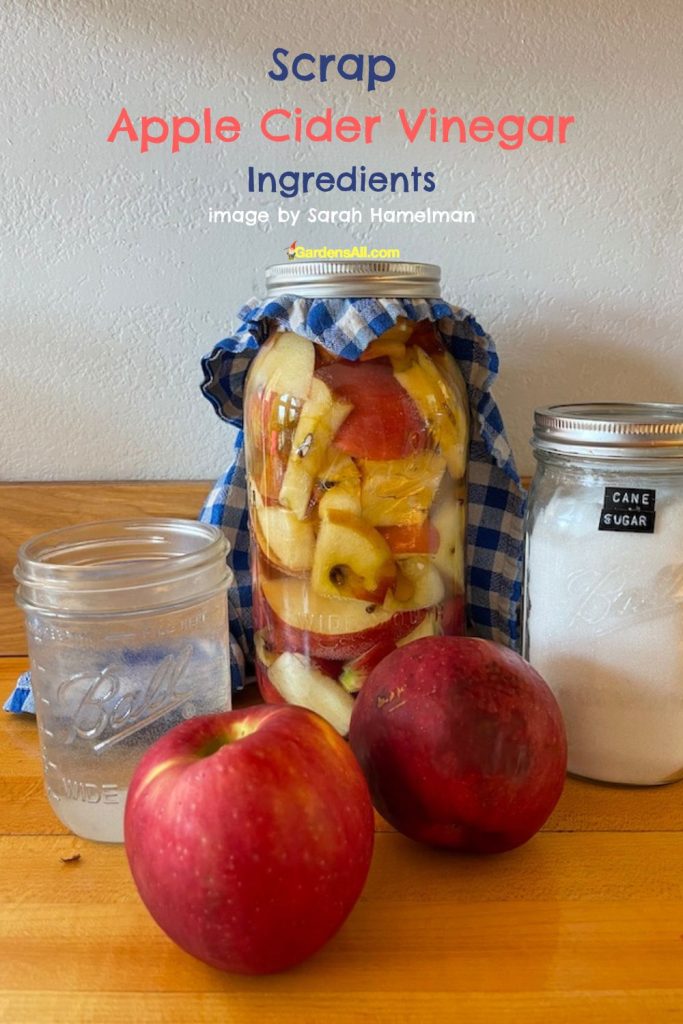
Ingredients for Scrap Apple Cider Vinegar
Place the following ingredients in a glass container.
- APPLE SCRAPS – Enough to fill a jar 3/4 of the way. You can use cores, peels, leftover pieces, bruised apples, lightly brown apples, etc.
- WATER – Enough non-chlorinated water to cover the apples.
- SUGAR – (white cane sugar is most common, but brown sugar also works). One tablespoon per cup of water.
Glass is essential, as vinegar will corrode even stainless steel. Ceramic containers can be used, such as are used for making homemade probiotics like sauerkraut, however, glass is best for visibility and end product storage and use.
Do NOT use metal lids that come with canning jars as ACV will cause metal lids to rust. Plastic lids are best for storing apple cider vinegar. You can use a large glass canning jar and a plastic lid with pour spout, or, you can funnel the filtered liquid into glass bottles with plastic lids.
Instructions for Homemade Scrap Apple Cider Vinegar
- FILL a glass jar about three-quarters of the way up with apple scraps. Lightly pack in; you can also gently shake it down to settle the contents.
- MIX the water and sugar in a separate container. Stir well.
- POUR the sugar water mixture over the apples.
- COVER the jar with a dish cloth, a disposable coffee filter, or a scrap of fabric, (something that’s not airtight so it will breath). Use a jar ring or a rubber band to secure the covering in place.
- SET the jar in a dark yet warm place for a minimum of two weeks. You may stir it daily if you wish; this will speed up the process.
- REMOVE the apples from the liquid mixture, and toss the scraps into your compost, or for your livestock if you have any.
- STRAIN the liquid, then put it aside for another two weeks to a month (or longer).
- CAP – When your ACV has that distinct vinegar smell and taste, it should be ready to cap off with a secure lid, preferably not metal, as these will rust from contact with vinegar.
Apple cider vinegar, properly made, doesn’t go bad and can last indefinitely, but some prefer to store their homemade apple cider vinegar in the refrigerator.
Serving Size and Prep Time
- Prep Time: Less than 5 minutes
- Cook Time: 4-8 weeks
- Serving Size: 2 Tablespoons
- Servings per Container: 21 (assuming that you used a 64-ounce jar with approximately 21 ounces of water poured over the apples)

How to Make Apple Cider Vinegar with the Mother
At some point, your apple cider vinegar may create a strange jello-like blob of goo at the top of your container. It will strongly resemble a kombucha mother. This is a vinegar “mother,” and it can be used to make even more batches of apple cider vinegar. You can store it in a separate container or keep it in your main jar of ACV.
When you’re ready to make a new batch of apple cider vinegar, drop the mother into the batch, and she will speed the process up by a significant amount.
You’re not likely to find apple cider vinegar with the mother in most vinegar brands. This is because most consumers are leery of cloudy-looking vinegar, so processors simply remove it. The mother contains so many health benefits, specifically good bacteria and enzymes, and it is best to leave it in the ACV. Remember that cloudiness is okay and perfectly normal.
Most processors pasteurize the ACV to remove the mother, which remove many of the health benefits of apple cider vinegar. When we don’t have time to make some, the you can get Braggs apple cider vinegar which includes the mother.
When you use your own homemade apple cider vinegar, be sure to shake up your bottle first before using it, so that way, you are always consuming at least a little bit of the mother for your own optimal health.
Troubleshooting Homemade Apple Cider Vinegar
Bubbles in the ACV
Bubbles indicate that you have a healthy level of good and active bacteria. This is a great sign!
Water Turns Yellow
It is part of the process for the water to lose its clarity while turning darker or a shade of yellow. This just shows that the liquid is turning into vinegar from water.
It smells like Alcohol
Apple Cider Vinegar will naturally turn alcoholic (Apple Cider) before it transitions into vinegar. It’s all part of the process.
Mold in Homemade Apple Cider Vinegar
Apple Cider will only mold if the apple slices float above the liquid and are exposed to air. Apples will naturally mold in damp spaces.
To prevent this, set a glass or ceramic piece (such as a small but heavy bowl or cup) on top of the apples, so they stay submerged. You must use ceramic or glass because you don’t want to allow other flavors, contaminants, or reactive substances into your apple cider vinegar.
If you already have mold, remove the moldy pieces, make sure to submerge the rest, and then let it ferment for about ten days more. If there are no signs of mold, continue with the process. But if the mold has returned, scrap this batch and start over.
Homemade Apple Cider Vinegar – a Gift That Keeps on Giving
If you grow apples, and/or if you’re into canning, fermenting and preserving foods, learning how to make homemade apple cider vinegar will serve you and your family for all the years to come, and maybe even add years to your life!
You may also be interested in making homemade probiotics like sauerkraut and kombucha.
How to Make Apple Cider Alcoholic
This is on our list to try. Meanwhile, if you’re interested in making apple cider alcoholic, this is a great video on how to make hard cider.
This is also a brief but informative article on how to make hard cider by Cornell University.
I’m LeAura Alderson, a garden, herb and plant enthusiast with a passion for discovering the many edible and medicinal benefits of the plants all around us, including the weeds, while transforming the land through regenerative permaculture practice. I am also a writer, editor and media publisher (now mostly retired due to replacement by AI), but which now allows more time to build our regenerative permaculture homestead farm.