If you’re wondering how to grow microgreens, you’re in luck because it’s simple. You can grow microgreens indoors year round at home, as a way to fortify your winter crops and food supply.
I’m not sure why we didn’t think to do it sooner. Probably just an oversight of busy schedules, but as we snip the seedling starts to thin them and munch on the tasty sprouts it dawned on me to look into it.
Our microgreens venture began with a sample of tiny seedlings thinned from a flat of kale, bok choy, and mizuna. Each tiny plant packed a punch of flavor, like its full grown version only more intense.
Being well into winter, we had both the time and the shelf space indoors to plant a whole flat of these tasty little greens. So why not try growing more of them?
We dug into on-line and hardcopy resources and found a world of information about growing microgreens. Bottom line, it doesn’t take much to get a microgreen “farm” going, but there are countless ways to do so.
Basic Needs for Growing Microgreens
- Seeds
- Growing Medium
- Container to hold the medium and the seeds
- Keep wet but not soaked with room temperature water
- Provide light source after germination
Questions About Microgreens
Q. So, what exactly is a microgreen?
A. Microgreens are juvenile vegetable seedlings with primary leaves.
Q. Are microgreens easy to grow?
A. Yep! Quick and easy to grow, requiring just a couple minutes daily to check water levels.
If you’re wondering what’s the difference between microgreens vs sprouts, check out this article.
Microgreens – Good things in Small Packages
In a conversation on the Gardens All Facebook page some folks were commenting on how it seems that everything is a superfood these days, which essentially renders none a superfood.
Sure, there’s lots of labeling that goes on in the nutrition and supplement industry, however, don’t be jaded by over-use of this term. In many cases when it comes to fresh produce compared to denatured packaged foods… nature’s food are mostly super nutritious.
Superfoods are nature’s multivitamins.
The quote “Good things come in small packages” is certainly true when it comes to the healthiest greens on the planet. We know that the potential of the plant exists within the seed, so when we eat seeds, legumes and sprouts, it stands to reason that we’re often also getting concentrated nutrients.
You can grow sprouts and microgreens year round for a ready crop of nutrient dense fresh food.

How to Use Microgreens
You can use microgreens in the same way you’d use sprouts and fresh greens.
- Salads
- Sandwiches
- Soups
- Stir fry
- Eggs, omelettes, egg bakes
- Casseroles
- Scattered on roasted veggies after removing from oven
- Added to Green juice
- In smoothies
- As herbs
Wherever you put microgreens, you’re fortifying your food with extra nutrients and flavor. Depending on what it is though, for those who aren’t fond of vegetables, these can be added to many things in disguise, especially if chopped finely like herbs.
Triple Savings from Growing Microgreens
We devour fresh greens daily in my family. Our favorite breakfasts include fresh omelets with fresh greens, such as spinach, chard or kale, or other fresh vegetables, including broccoli or leeks.
Egg bakes are another staple food we usually have on hand. They’re like a omelette only easier to make in quantity to serve throughout the week. They’re easy to make up ahead of time and can feed a family of four for three meals each, so you make it once and you get 12 breakfast servings out of it.
We love to top the omelettes and egg bakes with avocado and fresh sprouts or microgreens. We know how to grow sprouts, now we’re studying and practicing how to grow microgreens.
With egg bake, we double or quadruple the recipe, using ~24 eggs to serve a family of 4, 3 breakfasts each. Make it once and get 8-12 servings out of it, depending on your appetites and whether eating solo or with other sides, such as steamed or roasted veggies or dandelion salad.
Microgreens and shoots are one of the quickest and easiest things you can grow for food.
Here’s one example of a favorite broccoli egg bake recipe.
Growing Microgreens is Like Growing Your Supplements
We also go through periods of consuming fresh green juice for lunch or snack and daily salads for one of the meals. Having ready access to homegrown organic micro-greens year round makes a difference in our budget and our health!
Not only do we save at the grocery store, we need to purchase fewer supplements and make fewer trips to the doctor. That’s triple savings!
Microgreens are easy to grow and add potent nutrients to your meals.
Why Grow and Eat Microgreens?
- Fewer doctor visits
- Save on your grocery bill
- Fewer store bought supplements needed
Microgreens are called superfoods because they’re amongst the most nutrient dense foods for the size that you can consume, and yet, they’re super low in calories!
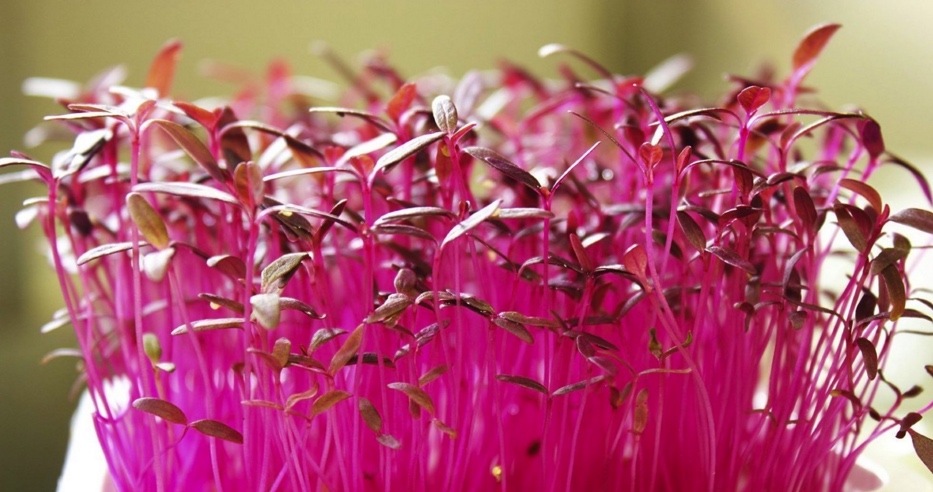
And yes… Micro “Greens” aren’t just green! We love the vibrant color of these Ruby Red Swiss Chard microgreens. These add delightful color as toppings to salads and other dishes.
Fresh greens, microgreens and herbs are straight from nature’s “farmacy”!
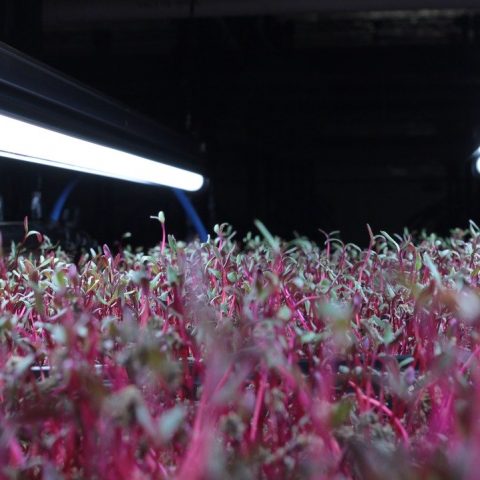
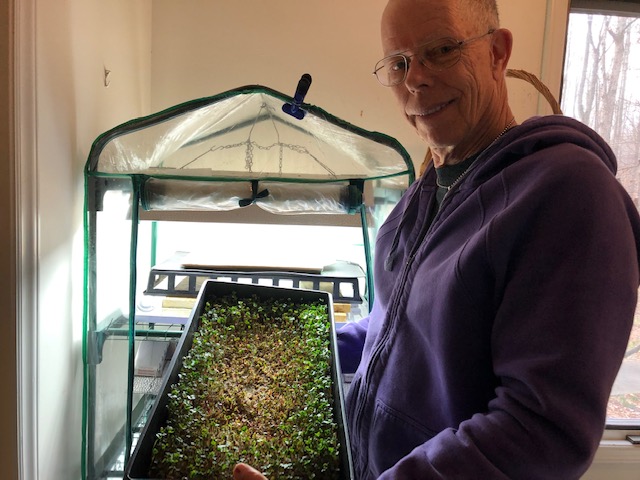
How to Grow Microgreens Indoors Year Round
If you can find room for a few seed trays by a bright window inside your home you can enjoy shoots and microgreens throughout the winter.
~Mark Ridsdill Smith, Gardener, Vertical Veg Man
Crops Good for Microgreens
- Rocket salad
- Bok choy
- Herbs like:
- basil – See our article on Basil Microgreens
- coriander
- Beans like:
- Fava
- Broad bean
- Peas
- Marigold – see also, marigold benefits and marigold tea
- Popcorn – can be eaten small as delicious shoots!
- Leaves of some root crops such as:
- Radish
- Carrots are tasty and tender when small, extending your choice even further.
Microgreen is the buzzword for leaves harvested small.
~Mark Ridsdill Smith, Gardener, author, Vertical Veg Guide
What you’ll need for growing microgreens
- Microgreens seed germinating tray
- Microgreen seeds
- Grow mat or medium
- Grow lights or window with good sunlight exposure
- Small watering can with slim spout
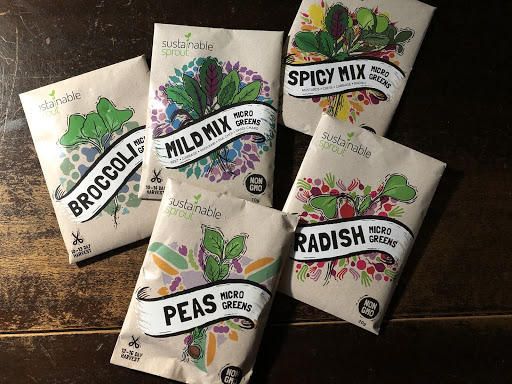
Sourcing Your Seeds
Sowing thickly means you’ll need lots of seeds. Buying these in conventional seed packs would be hugely expensive. Luckily there are other sources of much lower cost seeds, including:
- Microgreens seed packets. These come in mono and mixed packets.
OTHER OPTIONS THAT MAY BE MORE ECONOMICAL: - Dried seeds and legumes sold for cooking. These include dried peas, fava beans, coriander, fenugreek, dill and fennel. As long as they are reasonably fresh, most dried cooking seeds will germinate and grow successfully. You may want to test a few first, just to make sure – very occasionally you’ll find the odd batch that doesn’t.
- Seeds sold in bulk for sprouting are another economical source.
- Leftover seeds from unused seed packs that are approaching their use by dates.
Growing microgreens is an excellent way to use up any old seed packets you have may have aging in the back of a cupboard. Basil, dill, carrots, chard, spinach, rocket and cabbage all make excellent microgreens, to name just a few.
You can get a Complete Micro Green Growing Kit on Amazon, where you’ll find the kit to match your seed preference and budget.
Hydroponic Sectional Microgreens Growing Kit – Grow Micro Greens & Herbs Indoor Gardening: All Supplies – Seeds, Trays, Instructions – Handy Pantry
Contributions from the Community
Here’s a great idea for cheaper seeds for microgreens from a GardensAll reader:
You’re going to laugh but I buy food plot seeds for attracting deer. They have a lot of different mixers but the one I bought has daikon radish, kale, broccoli raab and seven top turnips. Plus the name’s hilarious.
~Debie Baugher
You can get these from Amazon, and likely at your local hunting and hardware shops.


Our Microgreens Seed Selections
We already had seeds, so we ordered this microgreens kit.
There’s really no exclusive thing called a microgreen seed. Just about any seed could qualify as a microgreen. The differentiation comes with how the baby leaves (cotyledons) taste. For example, cantaloupe seeds make awful tasting cotyledons unworthy of being dubbed microgreens.
The much tastier microgreens include arugula, radishes, red cabbage, red beet, and a variety of mustard types.[1]https://extension.psu.edu/growing-microgreens
With a starter set of assorted seeds, we get to see how each kind grows and what they taste like.
Just about any seed could qualify as a microgreen, but some are more tasty than others.
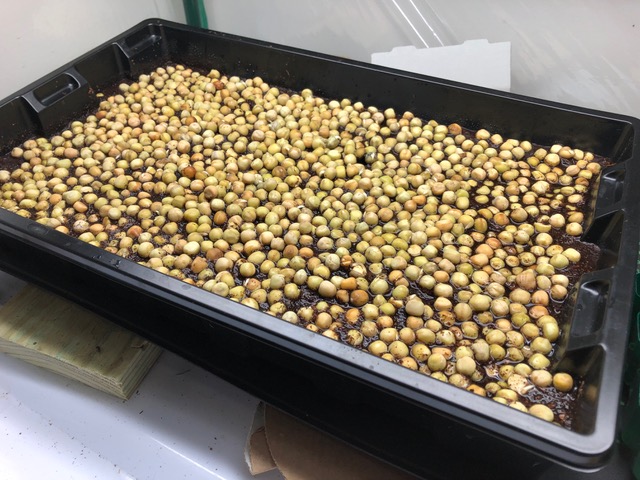
Field Peas Microgreens
We’ve just started a new batch of microgreen peas. The peas are among our favorites-their micro versions taste just like sweet peas and have a delicate crunch.
These field peas, AKA as dun peas, were procured in bulk from True Leaf. They were soaked in warm water for about three hours then carefully spread atop a half-inch layer of coconut “coir”.
The coconut fiber (coir) is the third non-soil medium we’ve used in growing microgreens. This particular CocoGro by Botanicare is clean and fine textured which allows for even germination, drainage and rooting.

Growing Mediums for Microgreens
The choices narrow to soil versus soil-less. We chose soil-less hemp mats for our first microgreens.
Hemp and jute grow mats are cleaner, easier to dispose. We also tried coco coir, which is also a good grow medium. As it turns out, there’s not much difference between the jute mats and the hemp mats. However, we prefer the jute mats for a couple reasons, including price.
Hemp Grow Mats
Each hemp pad fits a 5” x 5” grow container of eight will nearly cover the bottom of a standard 10” X 21” grow flat.
During the first couple days after the seeds were sown, the mats emitted a very unpleasant odor, or so we thought. It was something of a cross between poop and ammonia odor (at one point we thought a dog had gas)😀. So we opened the window and by around the third day the odor had definitely lessened.
However, our second batch of hemp mats from the same bag and batch, when sown with a different seed mixture, did not have the same smell, so it could be the seed mixture we used rather than the hemp grow pads.
HEMP GROW MAT COST:
$1.88 per tray at $15 per 8pk of mats
Hemp grow mats work great, but can have an unpleasant odor, especially for the first few days.

Jute Grow Mats
Jute growing medium works exactly the same as the hemp mats.
JUTE GROW MAT COST:
1.80 per grow tray $18.10 per 8 pack of mats, so a little more economical than hemp mats.
Coco Coir Growing Medium
The coco coir did a great job. We haven’t yet tried a side-by-side comparison or two different mediums in one tray was we did with the hemp and jute. Chances are we won’t for two reasons, which you’ll read about in our conclusion on the bests microgreens growing mediums below.
Best Microgreens Grow Medium
The winner is Jute!
We’ve concluded that for us, jute is the best microgreens growing medium. Jute works equally well to hemp, but is less expensive, and is also cheaper than coco coir but easier and much less messy.
Jute is the winner for the best microgreens growing medium.
If you have experience with other growing mediums to share, we’d love to hear.
Video of Jute vs. Hemp Microgreens Grow Medium
See the results of the cabbage microgreens trays in the photos below the video. Half of the tray is grown in jute grow mats, the other half is grown on hemp. Results are equal for both, with a lush bed of nutritious microgreens.

How to Sow Microgreens seeds
As a rule of thumb, the gap between each seed should be the same size as the thickness of the seed you are sowing. However, there’s no need to spend hours carefully measuring them out.
You don’t need to strive for perfect spacing; just make sure you don’t have too many seeds touching each other or bare areas and try to avoid layers. For larger micro greens, space your seeds further apart. No need to cover the seeds with soil. [2]https://extension.psu.edu/growing-microgreens
The average growth times for germination and harvesting will vary depending on climate and other conditions.
You can see in the photo below that the middle section is sparse because too much water was pooling there. We added cardboard there to elevate it and it’s much better now.
To get a good yield, sow seeds thickly. Keep wet but not soaking.
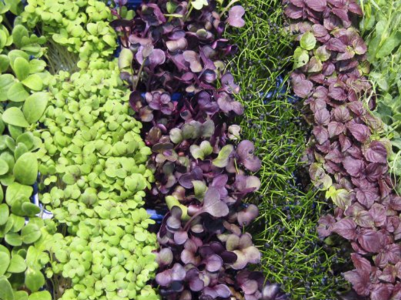
Growing Power Packed Microgreens
Favorite Microgreens to Grow
Arugula
Arugula is an easy microgreens to grow with a sharp, peppery flavor that adds zest to any salad and sandwich.
- Family: Brassicaceae
- Genus and species: Eruca sativa
- Average germination time: 2-3 days
- Average days to harvest after germination: 5-7 days
- Snippet: Common Names include “rocket” or “roquette” lettuce in the UK[3]https://tinyurl.com/pckv972
Beets
Earthy and a little bitter, baby beet greens are treasured for their vibrant red stems—that bring delightful color highlights to any dish.
- Family: Chenopodiaceae
- Genus and species: Beta vulgaris
- Average germination time: 4-7 days
- Average days to harvest after germination: 8-12 days
- Snippet: The earthy odor is geosmin, an organic compound produced by microbes in the soil
Bright Lights Chard
Colorful, with a subtle and versatile flavor, chard is a super-popular microgreen among chefs.
- Family: Chenopodiaceae
- Genus and species: Beta vulgaris
- Average germination time: 4-6 days
- Average days to harvest after germination: 9-12 days
- Snippet: Chard history places it in cultivation back to 350 BC.
See many more varieties to try at the source of this article: Chef Steps, linked in references below.[4]https://www.chefsteps.com/activities/microgreens-directory
Grow Microgreens in 7 days!
There are many things to love in growing microgreens. The best part is having a steady supply of fresh growing—live—food available year round to use for salads and sandwiches, zesty toppings for soups, omelettes, and vibrant nutrients to add to blend into green juices.
Equipment for Growing Microgreens
If you’ve been raising seedlings in flats for next season’s garden, then you likely have all the hard goods needed to grow microgreens. The flats (trays), lighting , sprayer/mister, heat mats, and some shelf space used for growing transplants can easily transition to growing microgreens.
You can see more on this in our article on our indoor greenhouse growing station. We’re really enjoying having this for seedlings and now microgreens, and my wife is happy that it’s migrated from taking up space in the dining room to the laundry/mud room!
What You’ll Need
We knew that any products or techniques used in this first venture growing microgreens would be experimental to say the least. Yet, nothing ventured, nothing gained. We’ll forge ahead and periodically report on the progress
Sowing Microgreens Seeds Video – Part 1
In this video, Coleman covers shows how to sow and start microgreen seeds.
Growing Microgreens Video – Part 2
We check in on our microgreens on day 4.

Microgreens – Part 3
You may also enjoy reading about the best herbs for colds and flu, and best medicinal herbs for homegrown remedies.
We hope to see you on the Gardens All Facebook page! Feel free to share your sprouting, microgreens and garden photos, we love to see them!
Meanwhile, please do chime in with comments, photos, tips, etc., about your experience with growing microgreens. We’ll add to our store of community knowledge.
Two great books on growing microgreens:
- Microgreens: A Guide to Growing Nutrient-Packed Greens by Eric Franks and Jasmine Richardson
- Garden: Indoor Grower’s Guide to Gourmet Greens by Mark Mathew Braunstein
Wisdom from the Community
While microgreens are super simple to grow, there can be challenges. GardensAll and Planting for Retirement member, Kassi Baker shared her experience in growing microgreens with us.
3 Major Challenges to Growing Microgreens
By Kassi Baker, former Microgreens Seller
1) Lack of even germination.
If moisture isn’t maintained evenly across the tray with watering (I spray with a spray bottle until germination), the seeds won’t germinate properly or at the same time. Stacking the trays about 3 high and rotating until germination maintains even moisture across the seeds and top of soil. A paper towel can work for this as well.
The larger seeds like pea and sunflower should be soaked for 24 hours prior to planting and prefer weight for germination. Even moisture bring us to our second challenge.
Let me know if you want the challenges on the business side of things!😊 My apologies for taking so long to reply!
2) Mold!
Sometimes, you can get mold growing on the surface of your growing medium, making growth uneven. While most molds are common and won’t cause harm if eaten, I would rather not take a chance!
It can be difficult to tell the difference between the fine root hairs and mold. If the white fuzziness disappears with a spray bottle, it is most likely root hairs.😉 To control mold, I bottom water after germination and try to make sure the soil dries a but between watering.
Cinnamon can be used to deter mold and fruit flies (which can also be an issue), and mold can also be controlled by a peroxide mixture.
3) Not enough light.
While micros are kept in the dark until germination and should be a little on the leggy side for harvest, getting the amount of light daily for each variety can be tricky.
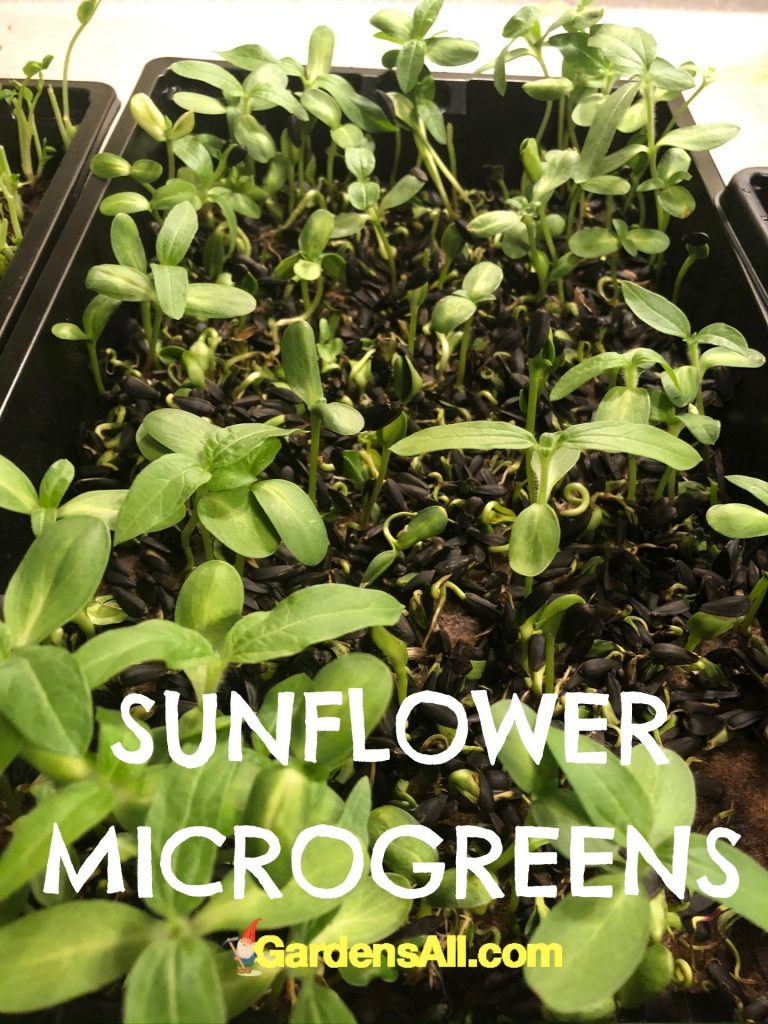
Microgreens Video – Growing Sunflower, Snow Peas and Cabbage
In this video we share about growing snow peas, sunflower and cabbage microgreens, and we love them all! We find it enjoyable to snip a handful and munch microgreens by itself for a quick healthy snack. But they’re also great with just about all foods, especially salads, sandwiches and mixed in raw with cooked veggies.
We also touch on our favorite kitchen countertop compost bin.
Growing Microgreens for Profit
If you’re interested in or considering growing microgreens for profit, The Urban Farmer, Curtis Stone has a great video that covers his top three most profitable and popular microgreens crops. Curtis even shares his retail versus cost per flat and how to harvest them.
Also, check out this info from Penn State Extension for helpful tips for growing and selling microgreens.[5]https://extension.psu.edu/growing-microgreens
Growing Dun (field) Peas Microgreens – Seeds
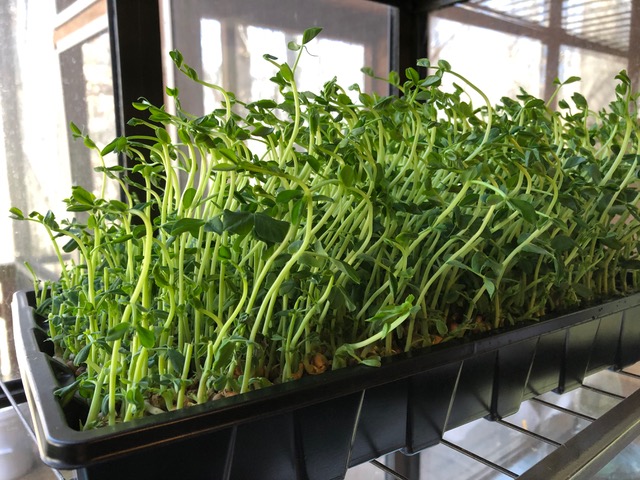
Growing Dun (field) Peas Microgreens at 2 weeks
Wishing you healthy microgreens harvests!
G. Coleman Alderson is an entrepreneur, land manager, investor, gardener, and author of the novel, Mountain Whispers: Days Without Sun. Coleman holds an MS from Penn State where his thesis centered on horticulture, park planning, design, and maintenance. He’s a member of the Phi Kappa Phi Honor Society and a licensed building contractor for 27 years. “But nothing surpasses my 40 years of lessons from the field and garden. And in the garden, as in life, it’s always interesting because those lessons never end!” Coleman Alderson
References