The Scoop on How to Infuse Herbs
Infusing herbs is a big topic. Not because it’s difficult, but because there are so many methods, mediums, herbs and uses.
So if you’re looking for how to infuse herbs because you’re just getting started, this will open up a world of possibilities for you in culinary, cosmetic and medicinal uses.
If you already have some experience infusing herbs, this may spark new ideas to try.
Infusing herbs is a simple and effective way to draw out the flavors, aromas, and medicinal properties of herbs and spices. These infusions can be used in cooking, baking, cocktails, and non-alcoholic beverages, as well as for health and beauty solutions.
In fact, herbal infusions are shown to be beneficial for reducing diabetes.[1]https://www.ncbi.nlm.nih.gov/pmc/articles/PMC7570648/
Since we cover so much in this article, here’s a table of contents so that you can easily jump to whichever section interests you most.
Table of Contents
A Brief Jaunt Through the History of Infusing Herbs in Oils
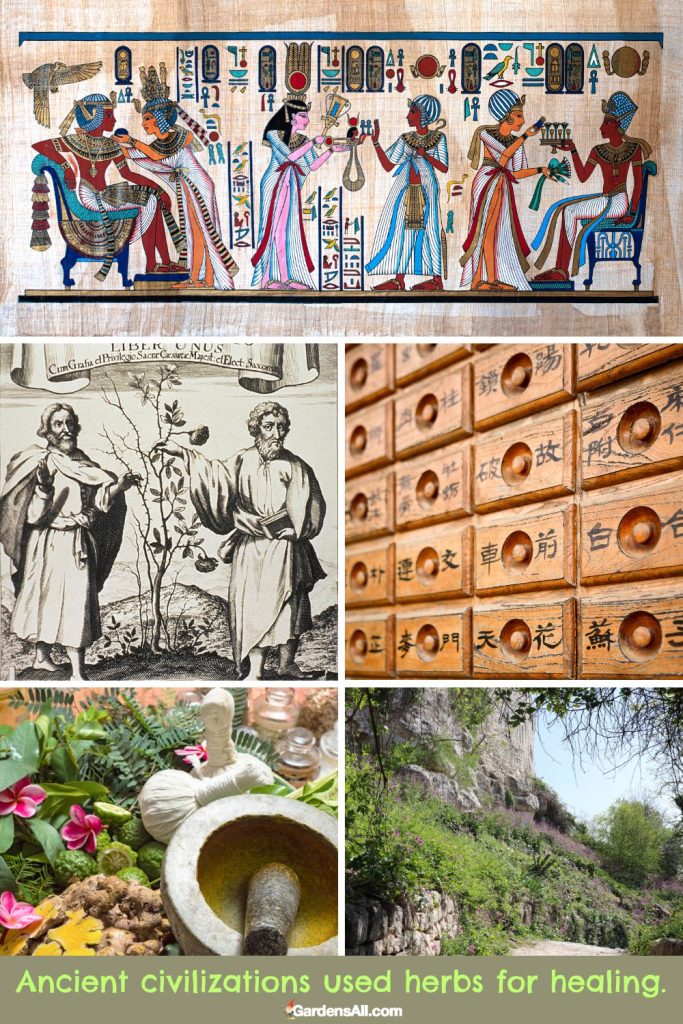
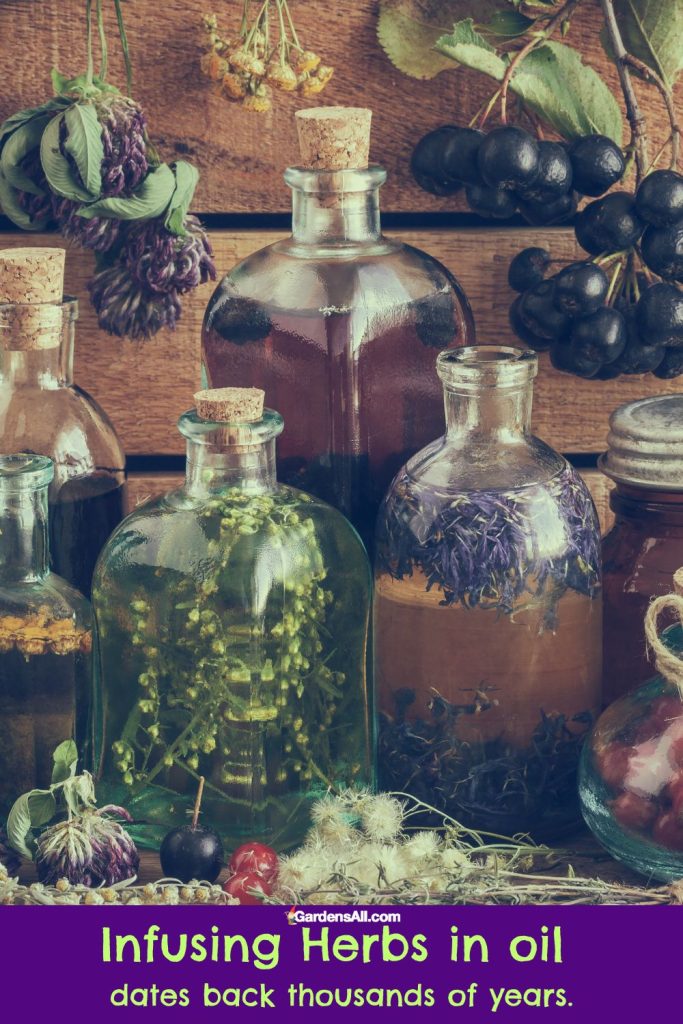
The practice of infusing herbs for food, medicine and cosmetics dates back to ancient civilizations. While it’s difficult to pinpoint exact dates or origin, there are historical references to the practice in various parts of the world dating back thousands of years.
- Ancient Egypt: The Egyptians were known for their advanced knowledge of cosmetics and medicinal plants. They used infused oils in their religious ceremonies, for skincare, and in the mummification process as early as 3000-2500 BC.
- Ancient Greece and Rome: The Greeks and Romans also used infused oils both for cosmetic and medicinal purposes. The physician Hippocrates, often referred to as the father of medicine, reportedly used infused oils in his treatments in the 4th and 5th centuries BC.
- Ancient China and India: These cultures have a long history of herbal medicine, with traditional Chinese medicine and Ayurveda using various infused oils in their practices. In Ayurveda, herbal-infused oils are used in treatments like Panchakarma for both internal and external therapies. These practices have been traced back thousands of years.
- The Middle Ages and Renaissance: Infused oils were used in medicine and cooking. For instance, Saint Hildegard of Bingen, a well-known herbalist in the 12th century, often used infused oils in her treatments.[2]https://www.healthyhildegard.com/healing-plants/
A Quick Overview on How to Infuse Herbs
Here’s a quick and simple guide to infusing herbs using oil, water, alcohol or vinegar.
Ingredients
- 1 cup fresh herbs or 1/2 cup dried herbs (such as basil, mint, rosemary, thyme, lavender, chamomile, or a mix)
- 2 cups water, oil, vinegar, or alcohol (depending on your intended use)
Steps
- Choose the type of infusion you want to make. Infusions can be water-based (for teas or broths), oil-based (for cooking or skincare), vinegar-based (for pickling or marinades), or alcohol-based (for cocktails or tinctures).
- Prepare your herbs. If using fresh herbs, wash them thoroughly and pat dry. Remove any brown or damaged parts. Chop fresh herbs to help release their flavors. If using dried herbs, ensure they are free of dust or other debris.
- Place the herbs in a jar. A mason jar works well for this. Make sure the jar is clean and dry before using.
- Hot and Cold Infusions:
- HOT INFUSIONS:
- Water for making teas. Heat until it’s hot but not boiling, (try to keep it under 140°F (60°C) to preserve nutrients.
- Oil – heat gently to between 95°F (35°C).
- COLD INFUSIONS – For teas, we’ve found these to be more flavorful with dried herbs, but you can use either fresh or dried herbs.
- Water – Pour cold or room temperature water over herbs to cover.
- Fridge – Let steep for a minimum of one hour; longer is better, such as overnight in the refrigerator.
- Sun – “Sunfusions” will be ready more quickly, but can be left out for several hours.
- Oil – Pour room temperature oil over herbs to cover by an inch.
- Let steep in dark room or…
- Steep in sunlight to expedite infusion.
- Vinegar & Alcohol – There’s no need to heat the vinegar or alcohol).
- Water – Pour cold or room temperature water over herbs to cover.
- HOT INFUSIONS:
- Pour the liquid over the herbs. Make sure all the herbs are fully submerged. If they float to the top, you may want to give the mixture a stir or add a bit more of the liquid medium you’re using.
- Let it steep:
- Hot Water infusions (as teas, from mild to concentrated) are best steeped for at least 15-20 minutes before straining. Longer is fine, although some herbs may become more slightly bitter.
- For oil, vinegar, and alcohol infusions, let the mixture steep for a few weeks, shaking it daily.
- traditional methods steeped in the sun.
- modern methods often recommend steeping in a cool, dark place
- Strain the infusion. Once your infusion has steeped to your liking, strain out the herbs using a fine mesh strainer or cheesecloth. You can toss the spent herbs into your organic compost bins.
- Store the infusion properly.
- Water infusions should be refrigerated and used within a week.
- Oil infusions:
- traditional methods did not utilize refrigeration; yet shelf stored oils can last for months.
- modern methods recommend refrigerating for a couple months.
- Vinegar and alcohol infusions can be stored at room temperature for several months or longer.
6 Best Oils for Herbal Infusions
Choosing the best oil for infusing herbs depends largely on your intended use for the infusion. Here’s a list of the top 6 oils for herbal infusions.
- Almond Oil
- Avocado Oil
- Coconut Oil
- Jojoba Oil
- Olive Oil
- Sunflower Oil
You can find expanded information on the what and why of best oils for infusing herbs here.
INFUSING HERBS IN OIL
Olive oil is the most popular oil for infusing herbs for culinary concoctions. However, you can use any in the list above except jojoba oil because of its wax-like density.
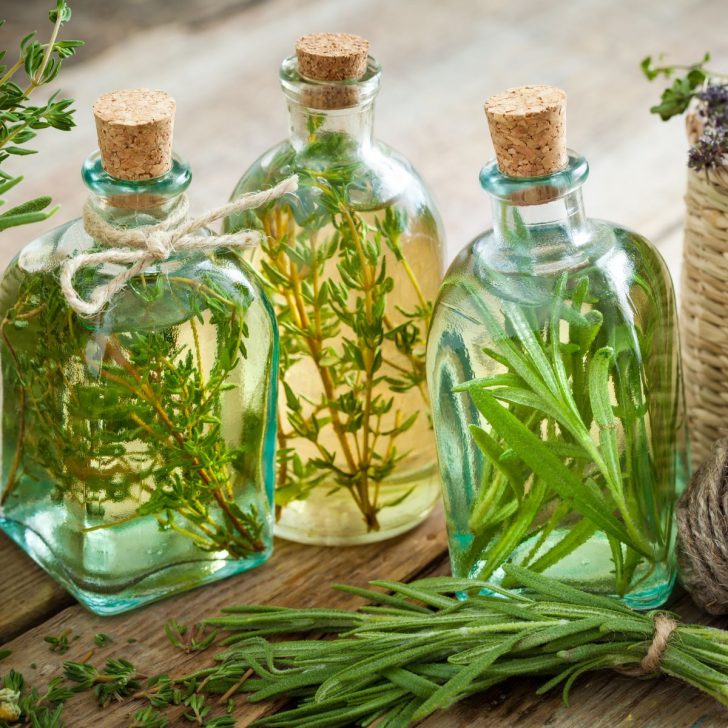
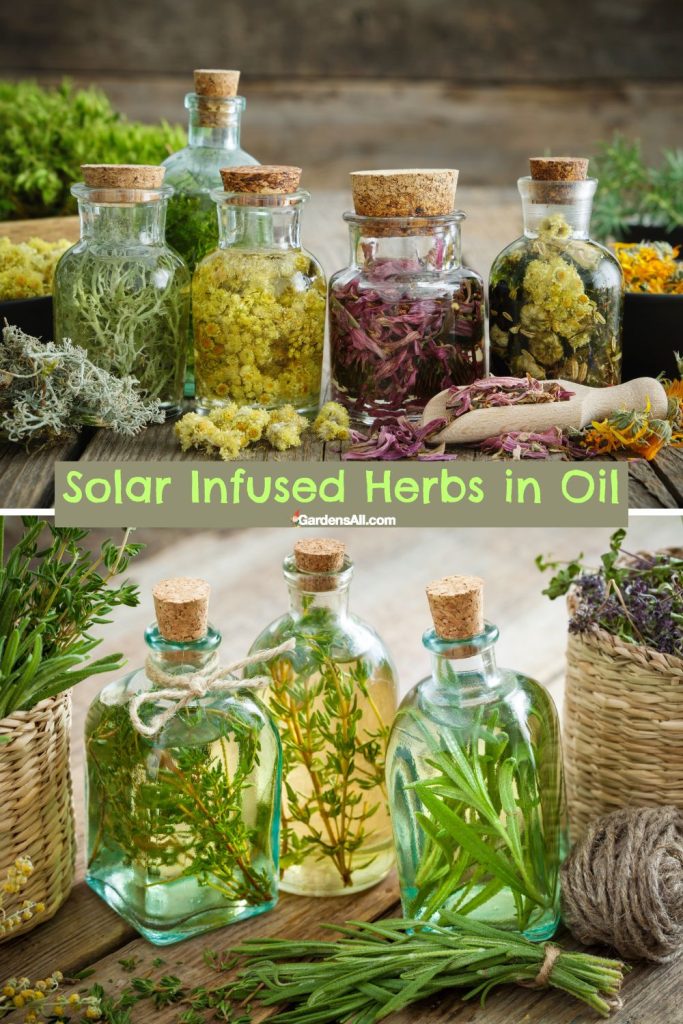
Solar Infusions – the Easiest Way to Infuse Herbs in Oil
The easiest way to infuse herbs is the age-old solar method, or sun-infused herbal oil.
Solar or sun infused oils are my favorite way to make infuse oils. Gardening and working with plants, we see daily how plants thrive in the sun. The ancient Indian traditional medicine of ayurveda, teaches of prana as “life force” that is in and all around us and which flows to us through the sun.
How to Make Solar Infused Herbal Oil
here’s a general step-by-step guide on how to make solar-infused herbal oils at home. You can use this method with herbs like calendula, lavender, chamomile, rosemary, and others.
Materials:
- Dry herbs of your choice
- High-quality oil (like olive, almond, or avocado oil)
- Glass jar with a tight-fitting lid
- Cheesecloth or fine mesh strainer
- Dark glass bottle for storage
- Label and marker for marking
Steps:
- Start with a clean, dry glass jar. It’s important that the jar is dry to prevent any water from getting into your oil which can cause it to go rancid, grow mold, or to develop botulism
- Fill the jar about half to three-quarters full, loosely packed, with fresh or dried herbs –
- Fresh herbs that are dried to be free of water, and are chopped or crushed to release the oils
- Dried herbs can provide a more concentrated infusion, plus avoid any risk of contamination from water content.
- Pour the oil into the jar/s, making sure to completely cover the herbs. Leave some space at the top of the jar.
- Stir the mixture with a clean spoon to get rid of any air bubbles and make sure all the herbs are submerged, then screw the lid on tightly.
- Steep for 2 weeks in a sunny, window, or outside in a protected area in the sun. The sun will naturally warm the oil and allow the herbs to infuse.
- Shake the jar lightly every day or so to help the herbs release their oils and essence.
- Strain after 2 weeks (or more), by pouring the oil through a cheesecloth or fine mesh strainer into a clean, dry dark glass bottle. Press the spent herbs with a spoon to completely extract as much of the rich infused oil as possible.
- Seal & label the bottle/s with the name of the herb and the date of straining. Store in a cool dark place or in the refrigerator.
- Store herbal infusions in a cool dark cabinet, pantry or refrigerator.
- Compost: We add the spent herbs to our organic compost. If you’re not yet composting you may want to check out these easy compost tumblers.
Notes
And that’s it!
Now you have a wonderful solar-infused herbal oil! These can be used for cooking, skincare, massage oils, homemade salves and balms, and many other uses.
Remember, the strength and quality of your infused oil depends on the quality of your herbs and oil. It’s always best to use organic herbs and high-quality oils for infusion. See best oils for herbal infusions.
Always store the oils in a cool, dark place. Depending on the oil you used, it can last up to a year. If it smells rancid or off, it’s time to compost it and make a new batch.
Remember to always do a patch test when using new herbal products on your skin to make sure you do not have any reactions.
NOTE: Refrigeration is not generally required (the ancients didn’t have it!), however many recommend this to extend longevity and to avoid the possibility botulism. See how to prevent botulism.
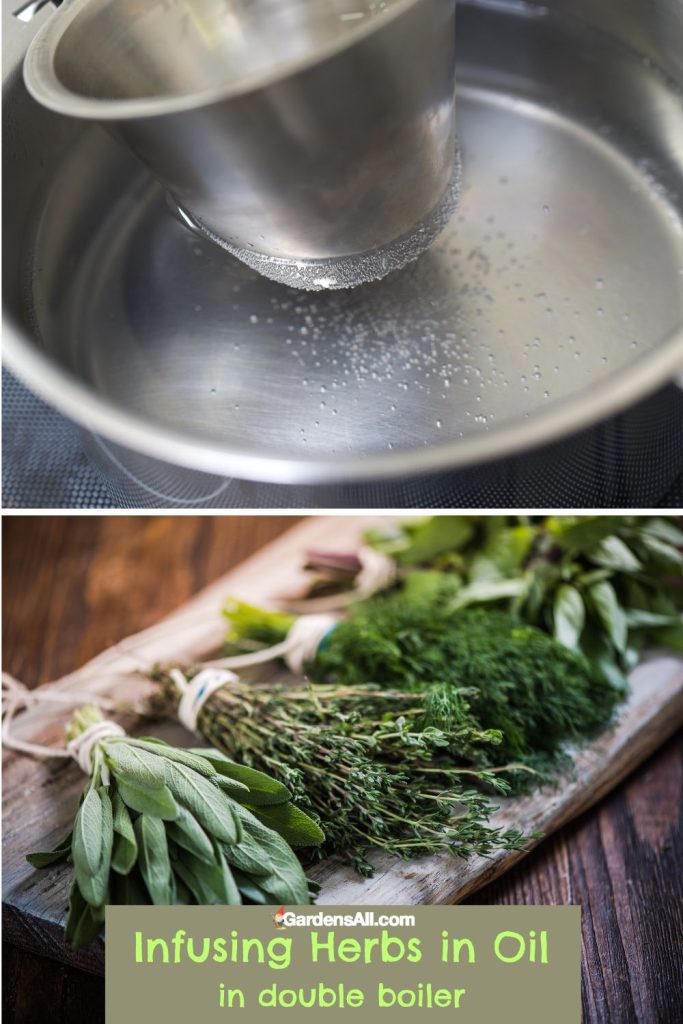
Double Boiler – the Quickest Way to Infuse Herbs on Stove
Materials:
- Fresh or dried herbs of your choice
- Oil of your choice (olive oil, coconut oil, jojoba oil, almond oil, etc.)
- Double boiler
- Cheesecloth or fine mesh strainer
- Clean, dry jar or bottle for storage
- Spatula or spoon for stirring
- Thermometer for ensuring a low temp (optional, but helpful)
Steps:
- Preparing Herbs: If you’re using fresh herbs, ensure they’re clean and free of dirt or insects. You may want to let them wilt for a day to reduce some of their water content, which can cause the oil to become rancid. Dried herbs, can be used as is.
- Measure Ingredients: A ratio of approximately 1.5 cups of oil to 1 cup of herbs. This isn’t an exact science, so you can adjust depending on how strong you want the resulting oil to be. Just add enough oil to cover the herb by an inch or two.
- Heat: Fill the bottom pot of your double boiler with a couple inches of water. Place the top pot on and turn on your stove to low heat. An ideal low heat is between 95-110°F (35-45°C)
- Combine Ingredients: Once your double boiler is heated, add your oil and herbs into the top pot. Stir them together until they’re fully combined.
- Infuse Oil: Let the oil and herbs heat together on a low simmer for around 2-3 hours. This gentle, slow heat will help extract the beneficial properties from the herbs without burning or destroying them. Make sure to stir occasionally.
- Cool Down: After the oil has been infused, turn off the heat and let the mixture cool down for a bit.
- Strain Oil: Once the oil is cool enough to handle, strain it through a cheesecloth or fine mesh strainer into a clean, dry jar or bottle. Press out as much oil as possible by squeezing or pressing it against the strainer with a spoon.
- Storage: Cap your jar or bottle, label, date and store it in a cool, dark place. If stored properly, your oil should last for about a year. Always check for any signs of spoilage before using.
Notes:
Remember that the type of herb and oil you choose will affect the final result, so feel free to experiment with different combinations to find what you like best. Always use caution when handling heated oils and pots to avoid any burns or accidents.
Storing Infused Oils
Traditional Methods of Storing Herb Infused OIls
Please note that herb infused oils have been made for thousands of years, and long before refrigeration was a thing. However, caution and knowledge is key.
Before refrigeration, people used various methods to preserve food, including drying, fermenting, smoking, pickling, and storing in fats or oils. Many of these methods create conditions that inhibit bacterial growth, either through reducing water content, increasing acidity, or introducing competing microorganisms, such as through fermentation.
Why Refrigeration is Typically Recommended for Herb Infused Oils
Liability and the risks associated with serving the public naturally plays a role in the formulation of food safety guidelines, thus the ubiquitous disclaimers everywhere for everything. However, these guidelines are primarily based on scientific research into how to prevent foodborne illnesses, and are important to know.
- Nature of the infusions: Not all infusions are created equal. Some herbs, spices, and other ingredients have antimicrobial properties, such as lavender and rosemary oil. An infusion made with these might be safer than one made with ingredients that do not inhibit bacterial growth.
- Clostridium botulinum spores: The issue with oil infusions of non-acidic foods in particular is the potential for C. botulinum spores to germinate and produce toxins. These spores are present in soil and can contaminate fresh produce. They can survive in the low-oxygen, low-acid, room-temperature conditions provided by an oil infusion.
- Modern food safety understanding: We know more about foodborne pathogens and food safety now than people did in the past. Today’s recommendations for refrigeration and other food safety practices are based on this understanding.
For more on that, see our article on how to prevent botulism.
In Summary
It’s important to note that while risk can never be completely eliminated, it can be minimized through appropriate practices. For home cooks, this might include refrigeration, using infusions in a reasonable amount of time, and being observant for signs of spoilage. For commercial food producers, more stringent measures are typically required.
Overall, cold infusing herbs in oil is a practice steeped in history, employed by many ancient civilizations, and has been passed down and adapted over centuries into the methods we use today.

I’m LeAura Alderson, a garden, herb and plant enthusiast with a passion for discovering the many edible and medicinal benefits of the plants all around us, including the weeds! I’m a writer, editor and media publisher for our family of websites.
While I was certified in fitness and life coaching, I am NOT a health practitioner. However, I’m a lifelong health enthusiast, with a keen interest in healthy, organic foods and making home remedies and the content we share is from our own experience and usage as well as that extracted from scientific research so that you can explore further on your own.
Always seek the advice and guidance of your health practitioners first and foremost.
As a family we’re steadily expanding our gardening, experimentation and knowledge around all things gardening, edible landscaping, fresh organic foods and self sustainability with farming in our future. I also own and manage iCreateDaily.com, a site all about transformation through creation, and the power of positivity, optimism and mindset.
References